Stay Ahead of Trouble: The Importance of Annual Plumbing Inspections
When it comes to home maintenance, plumbing rarely receives the attention it deserves—until something goes wrong. A dripping faucet or a slow-draining sink may seem minor, but these small issues can quickly snowball into costly problems. That’s why annual plumbing inspections play such a vital role in preserving the integrity and functionality of your home. They help spot potential hazards early, extend the life of your plumbing system, and save money in the long run. This proactive approach is more than just a preventive measure; it’s a smart investment in your home’s health and safety.
Spotting Problems Before They Escalate
One of the biggest advantages of regular plumbing inspections is the early detection of issues. From hidden leaks to slow-forming clogs, many plumbing problems develop quietly over time. You may not notice a pinhole leak behind a wall, but during an inspection, a professional plumber can identify subtle signs like damp spots, corrosion, or changes in water pressure. Catching these problems early can prevent water damage, mold growth, and structural issues that could otherwise go unnoticed until they become emergencies. Annual inspections give homeowners the opportunity to address these concerns while they’re still manageable and relatively inexpensive to fix.
Preventing Water Damage and Mold
Plumbing-related water damage can be devastating. Even a small leak, if left unattended, can lead to warped flooring, stained ceilings, and crumbling drywall. Worse yet, excess moisture from plumbing issues can foster mold and mildew growth, posing serious health risks to those living in the home. Annual inspections help ensure that all pipes, joints, and fixtures are intact and functioning as they should. During an inspection, professionals not only look for leaks but also check the condition of seals, valves, and drainage systems to ensure nothing is allowing moisture to escape. This thorough approach minimizes the risk of undetected water damage and keeps mold at bay.
Improving Efficiency and Reducing Utility Bills
An often-overlooked benefit of annual plumbing inspections is their potential to improve household efficiency. A well-maintained plumbing system uses less water and energy, which translates into lower utility bills. For example, undetected leaks in faucets or toilets can waste thousands of gallons of water annually. If your water heater is overworking due to sediment buildup, it might be using more energy than necessary to maintain a steady temperature. Regular inspections can identify these inefficiencies and offer solutions, whether it’s repairing a leak, cleaning the water heater, or upgrading to low-flow fixtures. The result is a more sustainable and cost-effective household.
Maintaining Water Pressure and Flow
Consistent water pressure is something many homeowners take for granted—until it suddenly drops. Poor water pressure can be caused by various issues, from clogged pipes to hidden leaks or corroded plumbing lines. Annual inspections help pinpoint the root cause of inconsistent water pressure before it becomes a major inconvenience. Professionals use diagnostic tools to measure pressure levels and check for obstructions or narrowing within the pipes. By resolving these problems early, you can continue enjoying steady and reliable water flow throughout your home without disruption.
Extending the Lifespan of Plumbing Components
 Like any other part of your home, your plumbing system has a finite lifespan. Pipes corrode, joints wear out, and seals degrade over time. Without routine inspections, these aging components are often overlooked until a major breakdown occurs. Annual plumbing inspections offer the chance to evaluate the condition of each part of the system and replace components before they fail. This not only helps prevent emergencies but also extends the overall lifespan of your plumbing network. With proper care and timely upgrades, your pipes, fixtures, and appliances can last much longer than if they were left unchecked.
Ensuring Safe Drinking Water
Clean and safe drinking water is a non-negotiable necessity in any household. Plumbing inspections play a critical role in maintaining water quality by ensuring there are no contaminants entering your water supply. Over time, corroded pipes can leach harmful metals, and cross-connections between potable and non-potable water sources can occur. During inspections, plumbers test for potential contaminants, check for backflow prevention, and confirm that water filters and softeners are functioning correctly. This oversight ensures your family continues to have access to fresh, safe drinking water every day.
Meeting Insurance and Legal Requirements
Many homeowners are unaware that some home insurance policies may include stipulations related to plumbing maintenance. In the event of a plumbing-related claim, insurers may require proof of regular inspections or maintenance. Failure to provide this could potentially impact your ability to receive compensation for damages. In some cases, especially in rental properties or commercial buildings, local regulations may also mandate regular plumbing inspections. Keeping up with annual checks ensures you’re in compliance with any relevant rules and reduces liability in case of accidents or water damage.
Preparing for Seasonal Changes
Different seasons bring different challenges for plumbing systems. In colder climates, winter can cause pipes to freeze and burst, while warmer months may bring heavy rains that test your drainage systems. An annual inspection gives plumbers the opportunity to prepare your home for upcoming weather conditions. They can insulate vulnerable pipes, clean out storm drains, and verify that sump pumps are working efficiently. These seasonal preparations are crucial for preventing emergencies tied to weather shifts and ensuring your home remains comfortable and functional year-round.
Protecting the Value of Your Property
Plumbing is one of the foundational systems that contribute to a home’s overall value. Potential buyers often pay close attention to the condition of plumbing when considering a property. A well-maintained system is a selling point that reflects positively on the home’s general upkeep. On the other hand, signs of neglect—such as outdated pipes, water stains, or musty smells—can raise red flags and reduce property value. Documented proof of annual plumbing inspections offers peace of mind to buyers and can serve as a key differentiator in a competitive real estate market.
Supporting Eco-Friendly Living
Today’s homeowners are increasingly aware of their environmental impact, and plumbing plays a direct role in resource conservation. An annual inspection supports eco-friendly living by identifying water waste and suggesting sustainable alternatives. Whether it’s upgrading to water-saving appliances or detecting a leak that’s silently wasting hundreds of gallons, a plumbing professional can help you make informed decisions that reduce your ecological footprint. The combination of saving water, reducing energy consumption, and lowering waste aligns perfectly with modern sustainability goals.
Reassurance and Peace of Mind
 Knowing that your plumbing system has been professionally inspected and is in top shape offers peace of mind that can’t be overstated. Instead of waiting for something to break and reacting under pressure, you get the confidence of knowing that your home is well cared for. Plumbing emergencies often strike at the most inconvenient times and can be both disruptive and expensive. Regular inspections shift your mindset from reactive to proactive, ensuring your comfort and minimizing stress in the long run.
Encouraging Responsible Homeownership
Annual plumbing inspections are not just about pipes and fixtures—they represent a commitment to responsible homeownership. Taking the initiative to schedule these inspections demonstrates a level of care and attentiveness that benefits not only the homeowner but also the community. Well-maintained plumbing reduces the risk of water waste and contamination, ultimately contributing to more sustainable neighborhoods. It also fosters stronger relationships with trusted service providers who understand the unique needs of your home and can provide timely advice or solutions when needed.
Landscaping and Plumbing: A Hidden Connection That Matters
When most homeowners think about landscaping, their minds drift to vibrant gardens, neatly trimmed hedges, or creatively designed patios. Plumbing, on the other hand, is often associated with indoor spaces like kitchens, bathrooms, and basements. Yet, these two essential aspects of home design and maintenance intersect in ways that can profoundly affect the function, longevity, and aesthetics of a property. The relationship between landscaping and plumbing is more interconnected than it may initially appear, and understanding this relationship can help homeowners avoid costly mistakes and enhance the health of both their outdoor and indoor environments.
Underground Infrastructure Is Not Invisible
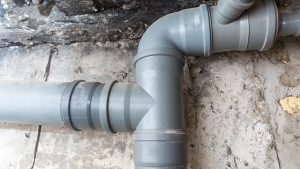
 Landscaping involves working with the top layer of a property—plants, soil, mulch, decorative elements—but just beneath the surface lies a complex web of pipes that provide water, remove waste, and support irrigation systems. One of the most crucial things to consider during any landscaping project is what’s beneath the soil. Tree roots, particularly from large species, have a natural tendency to seek out moisture, often leading them directly to underground plumbing pipes. Over time, these roots can infiltrate or wrap around pipes, causing cracks, blockages, and even bursts.
When planning landscaping improvements, particularly ones that include planting trees or installing large shrubs, it is essential to factor in the existing plumbing layout. Failing to do so might result in unintentional damage, which could be costly to repair and disruptive to daily life.
The Importance of Proper Grading and Drainage
Another major component of landscape design that directly ties into plumbing is grading. Grading refers to the way the ground slopes around a property. Improper grading can lead to water pooling in unwanted areas, often near the foundation of a house. This excess water can seep into basements or crawl spaces, causing mold, mildew, or even structural damage.
A well-designed landscape should encourage water to flow away from the home, which not only protects the building itself but also the underground pipes. Standing water can place excess stress on plumbing systems, especially older ones, by increasing the moisture in the soil and shifting the foundation. This can lead to misaligned or cracked pipes. A professional landscaping plan should always integrate an understanding of water flow and drainage to ensure that plumbing systems remain secure and effective.
Irrigation Systems Require Plumbing Precision
Modern landscaping often includes the installation of irrigation systems to ensure that lawns and gardens remain lush and green with minimal manual effort. These systems, while primarily above ground or just under the surface, rely heavily on plumbing principles. Valves, connectors, backflow preventers, and control systems all must be carefully designed and installed to ensure efficiency and to avoid waste or contamination.
An improperly installed irrigation system can result in leaks or backflow, where water flows backward into the clean water supply. This could potentially introduce pesticides or fertilizers into the household water, posing serious health risks. Thus, collaboration between landscapers and plumbing professionals is essential to create irrigation systems that are both effective and safe.
Plumbing Access Points Should Be Protected
Homes typically have several outdoor plumbing access points, such as sewer cleanouts, water shut-off valves, and hose bibs. These access points must remain clear and accessible at all times. Landscaping projects that cover or obscure these areas can create problems when quick access is needed for maintenance or emergencies.
For example, in the event of a blockage, plumbers need to locate and access the cleanout quickly. If it’s buried under decorative rocks or a newly installed garden bed, delays can occur, potentially making a bad situation worse. Keeping these areas in mind while landscaping ensures long-term convenience and cost savings.
Avoiding Soil Compaction and Pipe Stress
 Heavy landscaping equipment, vehicles, or even repeated foot traffic can lead to soil compaction. Compacted soil is not only less hospitable for plants but can also place additional stress on plumbing systems beneath the surface. Sewer and water lines are designed to endure natural soil pressure, but excessive or uneven weight can cause them to shift or break.
This is especially true for older homes with outdated plumbing materials like clay or cast iron. Planning landscaping in a way that limits heavy loads above known pipe routes can prevent unnecessary wear and damage. In addition, selecting soil types and plants that promote aeration and healthy root systems can indirectly support the integrity of underground pipes.
Rain Gardens and Sustainable Plumbing
Rain gardens have become increasingly popular as homeowners look for eco-friendly ways to manage stormwater. These gardens are strategically designed to capture and absorb rainwater runoff, helping to reduce erosion and filter pollutants. When implemented correctly, rain gardens can also support plumbing systems by reducing the amount of excess water that flows into municipal storm drains.
By managing rainwater at its source, these sustainable features reduce the risk of backups or flooding during heavy storms. They work hand-in-hand with proper drainage and sewer systems, highlighting once again the synergy between landscape and plumbing design. Coordinating with plumbing experts during the creation of a rain garden can maximize its effectiveness and ensure compatibility with existing water systems.
Managing Slopes and Terraces with Plumbing in Mind
For properties on hills or uneven terrain, landscaping often involves the construction of terraces, retaining walls, or slopes. These features not only improve aesthetics and functionality but also serve as important tools in managing water flow. However, if not engineered correctly, they can lead to concentrated runoff that overwhelms plumbing systems or causes erosion near critical infrastructure.
Incorporating perforated drainage pipes, French drains, or catch basins into sloped landscape features can help manage water more effectively. These components are rooted in plumbing principles and are vital for preventing water from pooling near buildings or flooding lower parts of the property.
Using Native Plants to Support Healthy Plumbing Systems
Plant selection plays an often overlooked but important role in supporting plumbing. Native plants typically require less water and are more adapted to local conditions, reducing the burden on irrigation systems. Their roots also tend to grow in patterns that are less aggressive than those of invasive species, meaning they’re less likely to encroach on plumbing lines.
Furthermore, native plants can contribute to improved soil health and erosion control, creating a more stable environment for underground systems. Thoughtful plant choices are therefore an integral part of landscape planning that considers plumbing longevity and performance.
Septic Systems Depend on Landscape Harmony
For homes not connected to municipal sewer lines, septic systems are an essential component of the plumbing infrastructure. These systems require ample space, proper soil conditions, and regular maintenance to function correctly. Landscaping around septic systems must be done with extreme care.
Deep-rooted trees and heavy construction should be kept away from drain fields to prevent root intrusion and soil disruption. Additionally, grading should ensure that water does not pool over the septic tank or drain field, which can lead to system failure. Understanding the mechanics of septic systems allows landscapers to design spaces that protect and prolong their performance.
Plumbing Inspections Before and After Landscaping Projects
Before undertaking any major landscaping project, a plumbing inspection is highly recommended. This helps identify existing underground systems and ensures that plans won’t interfere with water or sewer lines. Post-landscaping inspections can also confirm that no damage occurred during the work, providing peace of mind and helping to catch issues early before they become costly repairs.
Incorporating these inspections into the landscaping process makes it more comprehensive and shows a commitment to long-term property health. It’s a proactive step that reinforces the importance of cooperation between landscapers and plumbing professionals.
Collaboration Between Professionals Leads to Better Results
 Perhaps the most important factor in uniting landscaping and plumbing is communication. When landscaping designers, architects, and plumbers work together, the results are more seamless and sustainable. Joint planning ensures that aesthetic elements support rather than conflict with functional ones, creating outdoor spaces that are both beautiful and practical.
This collaboration also encourages innovation. For example, gray water recycling systems, which reuse water from sinks and showers for irrigation, are at the intersection of landscaping and plumbing. These systems require careful planning and installation but offer long-term environmental and financial benefits. When both disciplines come together, such opportunities can be more readily identified and successfully executed.
A Thoughtful Blend of Beauty and Utility
The outdoors is more than a place for gardens and patios—it’s a critical area where infrastructure supports comfort and functionality inside the home. Landscaping that overlooks plumbing considerations can lead to expensive damage and maintenance headaches, while thoughtful, integrated planning protects and enhances both systems. Whether it’s choosing the right tree, grading a slope, or installing a rain garden, every decision should account for what lies beneath the surface.
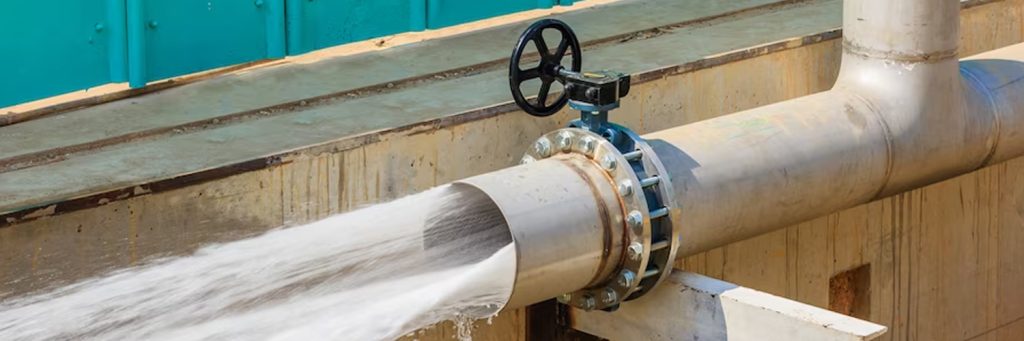
Mastering Wastewater Management in Plumbing Systems
Wastewater management plays a crucial role in modern plumbing, impacting everything from public health to environmental sustainability. It goes beyond merely transporting used water away from homes and commercial buildings. Instead, it’s a complex system that incorporates engineering, environmental science, and strict regulation. Understanding how wastewater is managed within plumbing systems is essential for professionals in the field, as well as for homeowners who want to maintain functional, efficient, and environmentally responsible systems.
The Basics of Wastewater in Plumbing
Wastewater refers to any water that has been used and carries waste materials. This includes water from sinks, showers, toilets, dishwashers, and washing machines. Once it leaves a fixture, it enters a system of pipes designed to carry it safely away from buildings. The goal is to prevent exposure to harmful bacteria and chemicals while also protecting water sources and ecosystems. This process begins right at the drain and continues until the water is either treated or released into the environment.
Plumbing systems are designed with separate lines for potable water and wastewater. Ensuring that these lines do not cross is one of the most fundamental principles of plumbing safety. Gravity often drives wastewater flow, moving it down through drainpipes and sewer lines, with the assistance of venting systems that maintain proper air pressure and prevent unpleasant odors from seeping back into living spaces.
Key Components of Wastewater Systems
The plumbing infrastructure for wastewater includes several essential elements. Drainpipes carry the used water downward and away from the source, while trap systems under each fixture hold a small amount of water that blocks sewer gases. Vent pipes run vertically and exit through the roof, ensuring that air can circulate and pressure remains balanced within the system.
Another critical component is the sewer line. This pipe typically exits the building underground and connects to a municipal sewer system or a private septic system. Proper installation and maintenance of this line are vital to prevent backups, leaks, and contamination.
When homes and buildings are not connected to a city sewer system, septic tanks are used to collect and treat wastewater on-site. These systems require careful monitoring and regular pumping to remove accumulated solids and maintain efficient operation. The importance of proper design, soil assessment, and periodic inspection cannot be overstated when it comes to septic systems.
The Journey of Wastewater from Source to Treatment
Once wastewater leaves the property, its journey continues through municipal sewer lines to a treatment facility. These facilities are built to handle massive volumes of water and rely on multi-step processes to clean and purify the wastewater before it’s returned to the environment.
The treatment process generally includes physical, biological, and chemical methods. Large debris is first removed using screens and grit chambers. Then, bacteria and microorganisms are introduced to break down organic material during the biological phase. Chemical treatment often follows to eliminate pathogens and neutralize harmful substances.
Cleaned water is typically released into rivers, lakes, or other bodies of water, while solid waste (also known as biosolids) is treated further and either disposed of safely or repurposed for agricultural use. This entire cycle ensures that water is reused responsibly and ecosystems remain protected.
The Importance of Backflow Prevention
One of the most critical safeguards in wastewater management is backflow prevention. Backflow occurs when contaminated water reverses direction and enters the clean water supply. This can be caused by pressure changes within the system due to broken pipes or sudden water usage surges.
To prevent this dangerous occurrence, plumbing systems incorporate backflow prevention devices such as air gaps, check valves, and reduced pressure zone assemblies. These features ensure a one-way flow of water and are especially vital in commercial and industrial settings where harmful chemicals may be present.
Regular testing and maintenance of backflow prevention systems are mandated in many jurisdictions, reflecting their importance in protecting public health and maintaining compliance with plumbing codes.
Environmental Impact and Sustainable Practices
Effective wastewater management is essential for environmental sustainability. When wastewater is not treated or managed properly, it can pollute rivers, lakes, and groundwater, leading to serious ecological consequences. Pathogens and chemicals can kill aquatic life, disrupt ecosystems, and make water unsafe for human use.
To counteract these effects, sustainable plumbing practices are increasingly being adopted. These include low-flow fixtures that reduce water usage, greywater recycling systems that reuse lightly used water for irrigation or flushing, and permeable surfaces that allow rainwater to recharge the groundwater supply instead of overwhelming sewer systems.
Green infrastructure, such as constructed wetlands and rain gardens, also plays a growing role in natural wastewater treatment. These systems use plants and soil microbes to filter and purify water while providing habitat and aesthetic value.
Challenges in Modern Wastewater Management
 Despite advancements, the plumbing industry continues to face significant challenges in wastewater management. Aging infrastructure, especially in older cities, leads to frequent breakdowns, leaks, and inefficiencies. Many sewer systems are combined, meaning they carry both stormwater and sewage, which can result in overflow during heavy rains.
Climate change is also complicating matters by increasing the frequency and intensity of extreme weather events. Flooding can overwhelm wastewater systems, leading to contamination and service disruptions. To mitigate these risks, cities are investing in infrastructure upgrades, smart monitoring systems, and emergency preparedness protocols.
Another major concern is the presence of emerging contaminants like pharmaceuticals, microplastics, and industrial chemicals that are not always removed by standard treatment processes. Research and innovation are needed to address these invisible threats and ensure water quality remains high.
The Role of Plumbing Professionals
Plumbers are on the front lines of wastewater management. Their role includes installing and maintaining drainage systems, ensuring code compliance, and advising property owners on best practices. Their work is essential in both residential and commercial settings and directly affects the health, comfort, and safety of occupants.
Training and certification programs ensure that plumbing professionals understand the complexities of wastewater systems and stay updated on changing regulations and technologies. Their ability to diagnose problems, prevent cross-contamination, and install efficient systems makes them indispensable to modern infrastructure.
Moreover, plumbers play a key educational role by informing clients about how their water usage habits can affect the larger system. Whether it’s advising against pouring grease down the drain or promoting water-saving upgrades, their guidance contributes to better outcomes for both individuals and the environment.
Smart Technology and the Future of Wastewater Systems
Technology is rapidly transforming wastewater management. Smart sensors and connected systems now allow for real-time monitoring of pipe conditions, flow rates, and contamination levels. This helps detect leaks early, prevent overflows, and optimize system performance.
Automated control systems can manage pumps and valves based on usage patterns, reducing energy consumption and wear. In some advanced systems, artificial intelligence is being used to analyze data and predict potential failures before they occur.
The integration of smart technology into plumbing and wastewater systems not only enhances efficiency but also enables better planning and resource allocation. These innovations are expected to become increasingly mainstream as the demand for sustainable, resilient infrastructure grows.
Education and Community Awareness
Public awareness is crucial for the success of any wastewater management initiative. Simple behaviors, such as not flushing non-degradable items or being mindful of chemical disposal, can have a significant impact on the performance of plumbing systems and the environment.
Educational campaigns, both at the community and institutional levels, are vital. Schools, municipalities, and environmental organizations often run outreach programs to teach people about the wastewater cycle and how their actions matter. When individuals understand the consequences of their habits, they’re more likely to adopt practices that protect plumbing systems and reduce environmental harm.
Maintenance and Inspection Best Practices
Routine inspection and maintenance are critical to keeping wastewater systems functioning properly. This includes checking for clogs, leaks, and signs of corrosion in pipes, as well as inspecting traps, vents, and backflow preventers.
For homeowners, this means being proactive about repairs, scheduling regular inspections, and using qualified professionals for any modifications or installations. For municipalities and larger facilities, it involves deploying teams equipped with cameras, sensors, and hydro-jetting equipment to identify and address issues before they escalate.
Preventative maintenance reduces the likelihood of emergencies, extends the lifespan of plumbing components, and ensures compliance with local codes and environmental regulations.
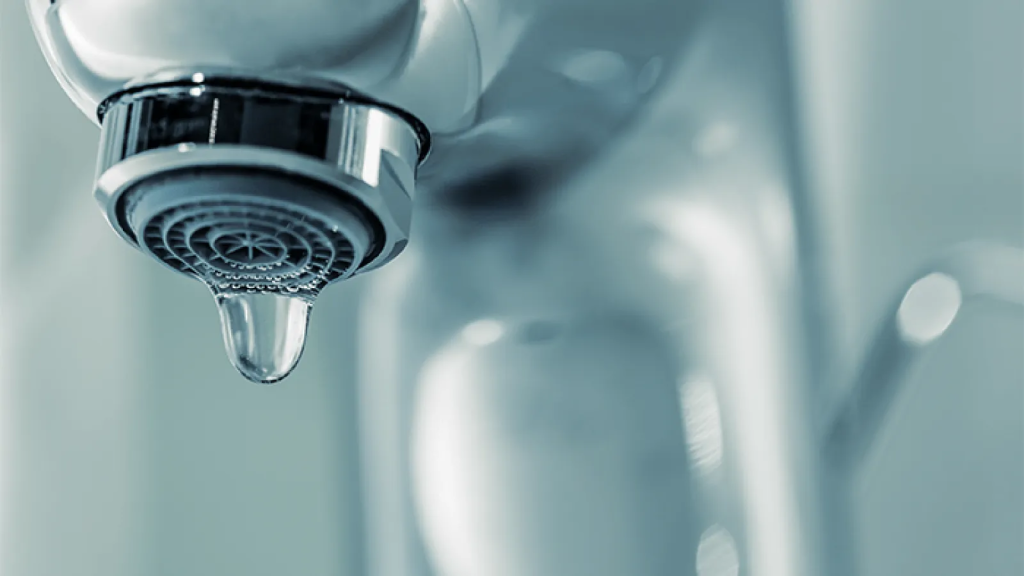
Smart Choices: Selecting Water-Saving Plumbing Fixtures for Your Home
When it comes to designing or upgrading a bathroom or kitchen, aesthetics often take center stage. However, choosing plumbing fixtures that conserve water is just as important. With increasing water scarcity and rising utility costs, being mindful of water usage has become essential. The right fixtures not only reduce your environmental impact but also save money in the long run. This guide explores how to select plumbing fixtures that help conserve water while maintaining performance and comfort.
Understanding the Importance of Water-Efficient Fixtures
Water efficiency in plumbing isn’t just about reducing consumption; it’s about using water smarter. Traditional fixtures often waste significant amounts of water without contributing to better hygiene or performance. From toilets and faucets to showerheads, newer technologies have revolutionized how plumbing fixtures operate. Choosing the right ones can make a substantial difference in your overall water footprint. These fixtures are designed to deliver the same experience while using far less water, and many come with certifications and ratings that help identify their efficiency.
Recognizing Key Water-Saving Certifications
One of the most reliable ways to ensure a fixture is water-efficient is by checking for certifications. The most common and widely recognized label is the WaterSense label, developed by the U.S. Environmental Protection Agency (EPA). Products with this label are tested and certified to meet specific efficiency and performance criteria. WaterSense-labeled fixtures often use at least 20 percent less water than standard models without compromising functionality. Recognizing these labels when shopping can serve as a trustworthy guide in making eco-conscious decisions.
Focusing on Low-Flow Showerheads
Showers can account for a significant portion of household water use. Older showerheads may use five gallons of water per minute or more, but modern low-flow models significantly reduce this number while maintaining a satisfying shower experience. When choosing a low-flow showerhead, it’s essential to consider factors like spray pattern, water pressure, and user comfort. Aerating models mix air with water to maintain pressure, while laminar-flow designs deliver individual streams for a steady feel. Both options can offer luxury while still reducing water usage.
Upgrading Toilets to High-Efficiency Models
 Toilets are among the largest water consumers in any household. Fortunately, modern high-efficiency toilets (HETs) have transformed how flushing systems operate. Dual-flush toilets offer two flush options—one for liquid waste and another for solid waste—allowing users to control water use depending on the situation. Pressure-assisted toilets use air pressure to boost flushing power with less water. These improvements significantly lower water usage per flush, making them an ideal choice for environmentally conscious homeowners.
Choosing Water-Efficient Faucets
Faucets, especially in kitchens and bathrooms, are frequent culprits of water waste. Installing faucets with low-flow aerators can make a big difference. These devices reduce water flow by adding air, maintaining pressure while using less water overall. Hands-free or touchless faucets also help prevent excess water use by turning off automatically when not in use. This can be particularly helpful in households with children or elderly individuals who may forget to turn off taps. Stylish and functional, these faucets seamlessly blend efficiency with modern design.
Considering Smart Fixtures for Greater Control
Technology has introduced a new wave of smart plumbing fixtures that provide users with even more control over their water consumption. Smart faucets and showers can be programmed to run for a set time or temperature, automatically shutting off when the desired settings are reached. Some models even connect to mobile apps, allowing homeowners to track water usage in real-time. These smart systems offer convenience, customization, and insight into daily water habits, helping households stay on top of their conservation goals.
Evaluating Materials and Durability
While water efficiency is crucial, so is durability. Fixtures made from high-quality materials like stainless steel or solid brass are not only longer-lasting but also less prone to leaks—another common source of water waste. Corrosion resistance and easy maintenance also play a part in long-term efficiency. A fixture that holds up well over time ensures that the water-saving benefits aren’t compromised by performance issues down the road. Investing in quality means fewer replacements and a reduced impact on the environment.
Considering Installation and Compatibility
Proper installation plays a big role in how well a fixture functions. Even the most efficient models won’t perform well if they’re not installed correctly. Ensuring compatibility with your existing plumbing system is essential. In some cases, older homes may need updates to accommodate newer water-saving technologies. Consulting with a professional plumber before making purchases can help avoid installation issues and guarantee optimal performance. A small investment in advice upfront can result in greater savings and functionality over time.
Exploring Options for Outdoor Fixtures
Water efficiency isn’t just an indoor concern. Outdoor fixtures like garden hose bibs, irrigation systems, and sprinklers also play a role in household water use. Choosing irrigation systems with moisture sensors or timers ensures water is only used when needed. Drip irrigation systems, which deliver water directly to plant roots, minimize evaporation and runoff. Installing weather-sensitive sprinkler controls can drastically cut down on waste, especially during rainy or cooler seasons. Outdoor efficiency supports a comprehensive water conservation strategy.
Comparing Cost vs. Long-Term Savings
While some water-saving fixtures may come with a higher upfront cost, the long-term financial benefits usually outweigh the initial investment. Reduced water bills, fewer plumbing issues, and potential rebates or incentives offered by municipalities can make the switch even more appealing. Over time, the savings from decreased water usage often cover the cost of new fixtures entirely. It’s important to view these upgrades not just as expenses, but as long-term savings tools with environmental benefits.
Avoiding Common Water-Wasting Mistakes
Even with efficient fixtures, bad habits can lead to unnecessary water use. Letting water run while brushing teeth, delaying repairs for minor leaks, or overusing garbage disposals can undo the benefits of efficient hardware. Building awareness around these habits and pairing efficient fixtures with responsible usage practices enhances overall water conservation. Education is just as vital as technology when it comes to creating a truly water-smart home.
Creating a Comprehensive Water-Saving Plan
A well-rounded approach to water conservation involves more than one-off upgrades. By evaluating the entire home—kitchen, bathrooms, laundry areas, and outdoor spaces—homeowners can implement a cohesive strategy that maximizes efficiency. Coordinating fixture replacements during renovations or incorporating water audits as part of regular maintenance helps keep efficiency top of mind. When all elements of the home work together toward conservation, the impact is more substantial and easier to maintain over time.
Balancing Style and Sustainability
Many homeowners worry that choosing efficient fixtures will mean compromising on style. However, modern manufacturers offer an impressive range of water-saving fixtures in various styles, finishes, and designs. Whether you’re after a sleek, modern look or something more traditional, you won’t need to sacrifice aesthetics for functionality. This alignment of beauty and sustainability ensures that your home reflects both personal taste and environmental responsibility.
The Role of Government and Community Programs
 In many areas, local governments and water authorities offer rebates or incentives for installing efficient plumbing fixtures. These programs are designed to encourage homeowners to make environmentally conscious upgrades. Participating in such programs can offset the cost of high-efficiency models and provide added motivation to switch. Checking with local utility companies or municipal offices can uncover valuable opportunities to save money while helping the community conserve resources.
Making an Informed Choice
Before purchasing new fixtures, it’s essential to research product reviews, consult with professionals, and assess your specific household needs. Different families have different patterns of water usage, and what works for one may not be ideal for another. Taking time to understand how various fixtures perform in real-life conditions will help ensure satisfaction in both performance and conservation goals. Don’t rush the process—well-informed choices lead to better results and longer-term benefits.
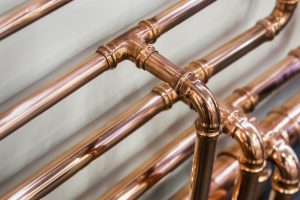
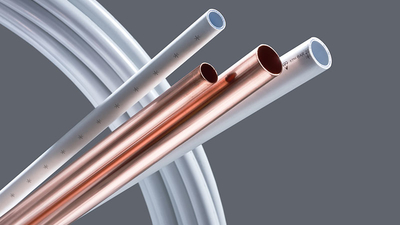
Copper or PVC? Choosing the Right Plumbing Material for Your Home
When it comes to plumbing, the materials behind your walls and beneath your floors are just as important as the fixtures you see. Among the most common materials used in residential and commercial plumbing are copper and PVC (polyvinyl chloride). Each of these materials has distinct qualities that affect performance, durability, cost, and ease of installation. Understanding the key differences between copper and PVC piping helps homeowners and contractors make informed decisions based on needs, budget, and long-term plans.
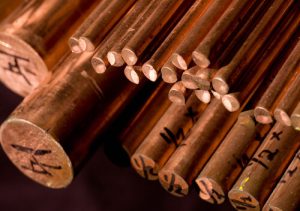
Understanding the Nature of Copper Piping
 Copper has been a trusted plumbing material for decades. Its long-standing use in homes and businesses is largely due to its excellent durability and reliability. As a metal, copper is naturally resistant to bacterial growth, making it a hygienic option for water supply lines. It’s also capable of withstanding high water pressure and extreme heat, which makes it a suitable material for both hot and cold water lines.
Another valuable characteristic of copper is its longevity. When installed correctly and under ideal conditions, copper piping can last for more than 50 years. It does not sag over time, and it offers a consistent internal diameter, which helps maintain steady water flow. These properties make copper an attractive choice for those who view plumbing as a long-term investment.
However, copper isn’t without drawbacks. It is more expensive compared to other materials, and prices can fluctuate with market conditions. Additionally, copper installation typically requires soldering, which involves open flames and a greater level of expertise. In older systems, there is also a potential for corrosion if water is highly acidic, although modern water treatment systems often mitigate this risk.
The Rise of PVC in Modern Plumbing
PVC has revolutionized plumbing in recent decades. This lightweight, durable plastic material is widely used for both drain-waste-vent (DWV) systems and cold water lines. Its ease of installation has made it a popular choice among DIYers and professional plumbers alike. PVC doesn’t require any welding or soldering; instead, pipes are joined using solvent cement, which makes for a quicker and safer installation process.
PVC is also resistant to corrosion, scaling, and chemical degradation. This makes it particularly suitable for applications involving wastewater or corrosive materials. Additionally, PVC is significantly more affordable than copper, which can make a major difference in the cost of a plumbing project, especially for larger-scale constructions.
Despite its many advantages, PVC does come with limitations. It’s not suitable for hot water lines unless a variant such as CPVC (chlorinated polyvinyl chloride) is used. PVC also tends to be more brittle in cold temperatures and can crack under stress or impact. Furthermore, while PVC is generally long-lasting, it doesn’t have the proven decades-long track record of copper in terms of lifespan and performance under pressure.
Comparing Durability and Longevity
Durability is often a deciding factor when selecting plumbing materials. Copper stands out for its ability to withstand extreme temperatures and pressures, along with its resistance to UV rays. It performs well in both indoor and outdoor applications, though it may still need insulation in freezing climates to prevent bursts.
PVC, while durable in its own right, does not hold up as well under extreme heat or cold. Prolonged exposure to UV light can weaken its structural integrity, making it unsuitable for outdoor applications without proper protection. For internal plumbing where environmental exposure is minimal, PVC performs admirably, but in more demanding scenarios, copper usually has the edge.
Cost Considerations and Budget Planning
 The cost difference between copper and PVC is substantial. Copper’s higher price point can significantly increase the overall cost of a plumbing installation, particularly in large buildings or full-home renovations. The material itself is expensive, and the labor cost associated with copper installation is also higher due to the need for soldering and specialized tools.
PVC offers a much more budget-friendly option, both in terms of material and labor. Its ease of handling and quick installation reduce the time and cost required for a plumbing project. For many homeowners working within a limited budget, PVC presents a practical alternative without sacrificing essential functionality.
That said, the lower upfront cost of PVC doesn’t always equate to better long-term value. Copper’s extended lifespan and proven reliability may provide a better return on investment over several decades, especially in homes where future renovations are unlikely.
Water Quality and Health Impacts
Plumbing materials can influence the taste and safety of drinking water. Copper has natural antimicrobial properties that prevent bacteria from thriving inside the pipes, making it one of the safest options for potable water. While extremely high levels of copper in water can be harmful, regulated municipal water systems ensure that copper piping remains safe for consumption.
PVC does not corrode or leach metals into the water supply, which also supports water quality. However, there have been concerns regarding the leaching of chemical additives used in PVC manufacturing. While modern PVC pipes are considered safe for water supply lines, especially when certified by national plumbing standards, they may still impart a slight plastic taste to water, particularly if the pipes are newly installed.
For those particularly sensitive to taste or concerned about potential contaminants, copper might feel like a more reassuring choice. However, PVC still meets safety standards for potable water in many jurisdictions and continues to be widely used in residential applications.
Ease of Installation and Flexibility
From an installation perspective, PVC often wins the favor of plumbing professionals and DIY enthusiasts alike. It is significantly lighter than copper and easier to cut and fit. The solvent welding process used with PVC is straightforward and doesn’t require flames or advanced skills. This allows even novice homeowners to carry out minor plumbing repairs or installations with relative ease.
Copper, while more labor-intensive, offers a tighter, more secure connection when soldered properly. The process is more technical, and mistakes can lead to leaks or pressure issues down the line. That said, many professional plumbers are still highly trained in copper installation, and its durability often justifies the added complexity.
PVC also offers greater flexibility when laying out complex plumbing networks due to its range of fittings and ease of customization. In homes with unique architectural constraints or remodeling projects with tight spaces, PVC can often be maneuvered more easily than rigid copper piping.
Environmental Impact and Sustainability
Environmental considerations are increasingly influencing construction decisions. Copper is a natural material that is 100% recyclable, making it a more sustainable choice in the long term. Reclaimed copper can be reprocessed without loss of performance, reducing the environmental footprint of new plumbing installations.
PVC is derived from petrochemicals and is not biodegradable. While it is possible to recycle PVC, the process is more complex and less common than metal recycling. The manufacturing of PVC also involves chemicals that raise concerns about emissions and environmental harm. However, because PVC requires less energy to produce and install, some argue that it still has a favorable environmental impact when compared to metals that require extensive mining.
When considering sustainability, the end-of-life recycling potential of copper tends to make it a greener option overall. Nonetheless, improvements in PVC recycling technologies may narrow this gap in the future.
Performance in Different Applications
The choice between copper and PVC often depends on the specific requirements of a project. For hot water lines, copper is clearly the superior choice unless CPVC is used. For cold water supply lines and drain lines, both materials are viable, with PVC often preferred due to ease and cost.
In commercial buildings or multifamily residences, where water usage and system complexity are greater, copper’s performance under pressure and temperature variations makes it the preferred material. For smaller-scale residential projects or additions, PVC is frequently chosen for its convenience and affordability.
In some cases, hybrid systems are used, combining the strengths of both materials. Copper might be used for the main supply lines while PVC is installed in secondary branches or for drainage systems. This blended approach can provide both performance and savings when used strategically.
Grease Traps in Commercial Plumbing: Why They Matter More Than You Think
In the complex web of commercial plumbing, grease traps play a critical but often overlooked role. Restaurants, hotels, catering facilities, cafeterias, and other commercial kitchens all produce large volumes of fats, oils, and grease (commonly referred to as FOG). Without a system in place to intercept and manage these substances, the plumbing network would quickly become overwhelmed. Grease traps, also known as grease interceptors, are designed specifically to prevent such disasters. Their importance extends far beyond mere compliance, influencing hygiene, operational efficiency, and even environmental sustainability.
Understanding How Grease Traps Work
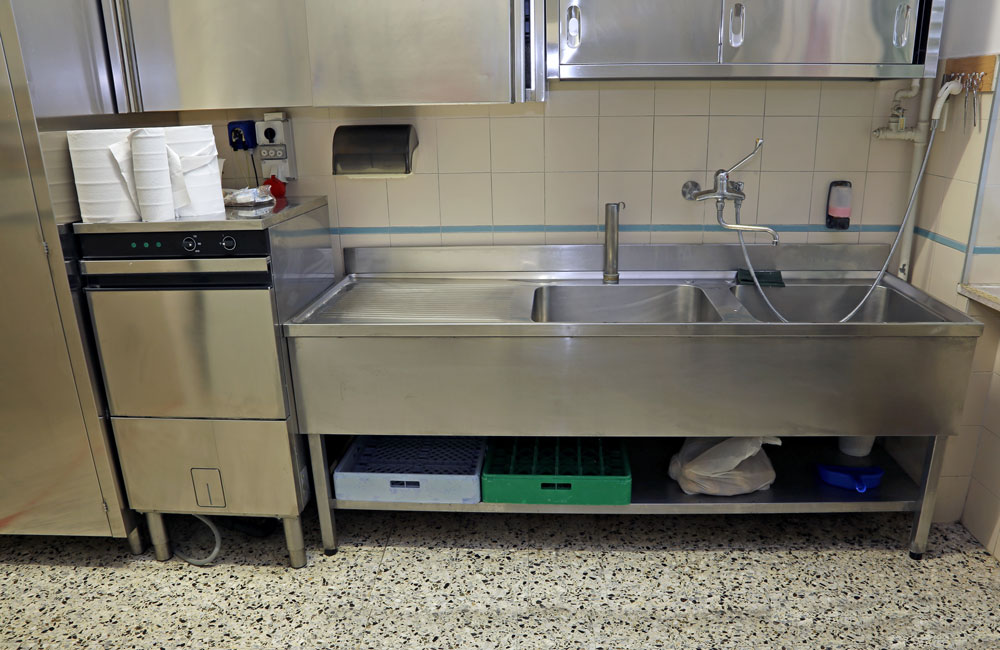 To appreciate the value of grease traps, it helps to understand how they function. Grease traps are plumbing devices installed between kitchen drains and the main sewer line. When wastewater flows from sinks and dishwashers, it carries food particles and grease with it. Inside the trap, the mixture slows down, allowing heavier solids to settle at the bottom while grease, being lighter than water, floats to the top. This separation process prevents the FOG from entering the main sewage system.
Regular cleaning ensures that the trap maintains its effectiveness. If neglected, the trap becomes a liability rather than an asset. Backups, foul odors, and clogged pipes can quickly follow, causing both health concerns and operational setbacks.
Preventing Costly Blockages and Downtime
One of the primary benefits of grease traps is the prevention of blockages in plumbing systems. Fats, oils, and grease can solidify as they cool, leading to restricted flow or complete obstructions in sewer lines. In commercial settings, where large volumes of wastewater are discharged daily, such blockages can become both frequent and costly.
Restaurants and food establishments cannot afford extended downtime due to plumbing issues. A blocked drain can disrupt service, delay operations, and even cause temporary closures. Grease traps act as a first line of defense, catching grease before it has a chance to harden and accumulate in the pipelines. This simple yet powerful function helps ensure uninterrupted business activities and protects the infrastructure from avoidable wear and tear.
Maintaining Hygiene and Odor Control
Cleanliness and hygiene are non-negotiable in any commercial kitchen or food service facility. A poorly managed grease trap can quickly become a source of contamination. When traps overflow or become clogged, they can emit unpleasant odors that spread throughout the kitchen and dining areas. This not only affects the comfort of customers and staff but also damages the reputation of the establishment.
Regular grease trap maintenance is vital for keeping odors under control and maintaining a safe, sanitary environment. Traps that are emptied and cleaned on a schedule remain effective at capturing grease and reducing foul smells. This proactive approach enhances the overall cleanliness of the kitchen and contributes to a more pleasant working environment for staff and a more enjoyable experience for guests.
Protecting Municipal Sewer Systems
Beyond the walls of the commercial kitchen, grease traps serve a larger purpose in protecting public infrastructure. When grease enters the municipal sewer system, it can create massive clogs and contribute to a phenomenon known as “fatbergs”—large, rock-like formations of grease and debris that block sewage flow. These obstructions are difficult and expensive to remove, often requiring specialized equipment and extensive labor.
Municipalities around the world are taking action to combat fatbergs, and commercial establishments are increasingly being held accountable. Many local authorities mandate the installation and regular maintenance of grease traps in food-service businesses. By complying with these regulations and maintaining functioning grease traps, businesses play a direct role in preserving the integrity of public sewer systems.
Meeting Regulatory Compliance
Grease traps are not just good practice; in most jurisdictions, they are a legal requirement. Health departments, sanitation agencies, and environmental regulators have all recognized the damage that unregulated grease discharge can cause. Compliance with grease trap regulations helps avoid fines, penalties, and forced closures.
Regulatory bodies often conduct inspections to ensure that grease traps are installed correctly and maintained regularly. Documentation of cleaning schedules and professional servicing may be required. Establishments that invest in proper trap installation and upkeep demonstrate their commitment to public health and environmental responsibility.
Contributing to Environmental Sustainability
In a world that is increasingly focused on sustainability, grease traps play an important role in environmentally responsible plumbing. When grease is allowed to enter the sewer system unchecked, it not only causes mechanical issues but also pollutes waterways and ecosystems. Wastewater treatment plants are not designed to handle large volumes of grease, and overburdening these systems can reduce their effectiveness.
Proper grease disposal also opens up opportunities for recycling. Collected grease can be processed into biofuel, a renewable energy source that reduces reliance on fossil fuels. Some companies now specialize in collecting used cooking oil and grease from commercial kitchens for conversion into usable products. Through these initiatives, businesses can turn waste into a resource, contributing to a greener future.
Extending the Lifespan of Plumbing Systems
 Commercial plumbing systems are a significant investment. Repairing or replacing pipes, pumps, and drains can be expensive and time-consuming. Grease traps offer a preventive measure that significantly extends the life of plumbing infrastructure.
When grease is kept out of the pipes, there is less wear on components, fewer emergency repairs, and lower overall maintenance costs. Over time, this translates into substantial savings for business owners. A well-functioning grease trap is not just a regulatory necessity—it’s a protective shield for your entire plumbing system.
Improving Kitchen Efficiency
In a high-pressure kitchen environment, efficiency is everything. A clogged sink or slow-draining dishwasher can bring operations to a halt. Grease traps, when properly sized and maintained, allow wastewater to flow freely without obstruction. Staff can work with confidence, knowing the plumbing system is equipped to handle daily demands.
Moreover, fewer plumbing emergencies mean less disruption and fewer calls to repair services. Scheduled maintenance becomes manageable, predictable, and affordable. With fewer unexpected issues, the kitchen operates like a well-oiled machine, focused on serving customers rather than dealing with breakdowns.
Educating Staff on Best Practices
The effectiveness of a grease trap is not just about its design—it also depends on how staff use the kitchen. Pouring large quantities of grease down the drain, neglecting to scrape plates, or failing to use sink strainers can overload the trap and reduce its efficiency. Staff training is a crucial aspect of a successful grease management plan.
Teaching employees about the importance of keeping grease out of the drain helps minimize the strain on the trap and reduces the frequency of cleanouts. Simple practices like wiping pans before washing or disposing of food scraps in the trash can make a big difference. A culture of awareness and responsibility helps preserve both the plumbing and the cleanliness of the workplace.
Choosing the Right Grease Trap
Not all grease traps are created equal. Choosing the right model depends on the size and nature of the establishment. Small under-sink models may suffice for cafes or delis, while larger operations may require in-ground interceptors with high capacity. Consulting with a plumbing professional ensures that the right type of trap is installed to handle the specific volume and type of waste produced.
Factors like flow rate, ease of access for maintenance, and local code requirements should all be taken into account. Investing in the right equipment from the beginning prevents headaches later and ensures compliance with health and safety standards.
Scheduling Regular Maintenance
Even the best grease trap won’t function effectively without regular maintenance. Over time, the accumulated grease and solids need to be removed. Skipping cleanouts or delaying service appointments can lead to overflows, clogs, and health code violations.
Most businesses find it helpful to establish a service contract with a licensed plumber or grease removal company. These professionals can handle the cleaning, disposal, and documentation needed to stay in compliance. Keeping a log of maintenance activities ensures transparency and accountability, and gives inspectors confidence in your operation.
The Role of Technology in Grease Management
Modern grease trap systems are becoming more sophisticated. Some models are equipped with sensors that monitor the level of grease and alert staff when it’s time for a cleanout. Others include automatic skimming and heating systems to improve efficiency. These technologies offer greater control over grease management and can reduce the frequency of maintenance visits.
By investing in advanced systems, commercial kitchens can streamline their operations and reduce the burden on staff. Technology also makes it easier to track compliance and create digital maintenance records. As innovations continue, grease traps will likely become even more effective and user-friendly.
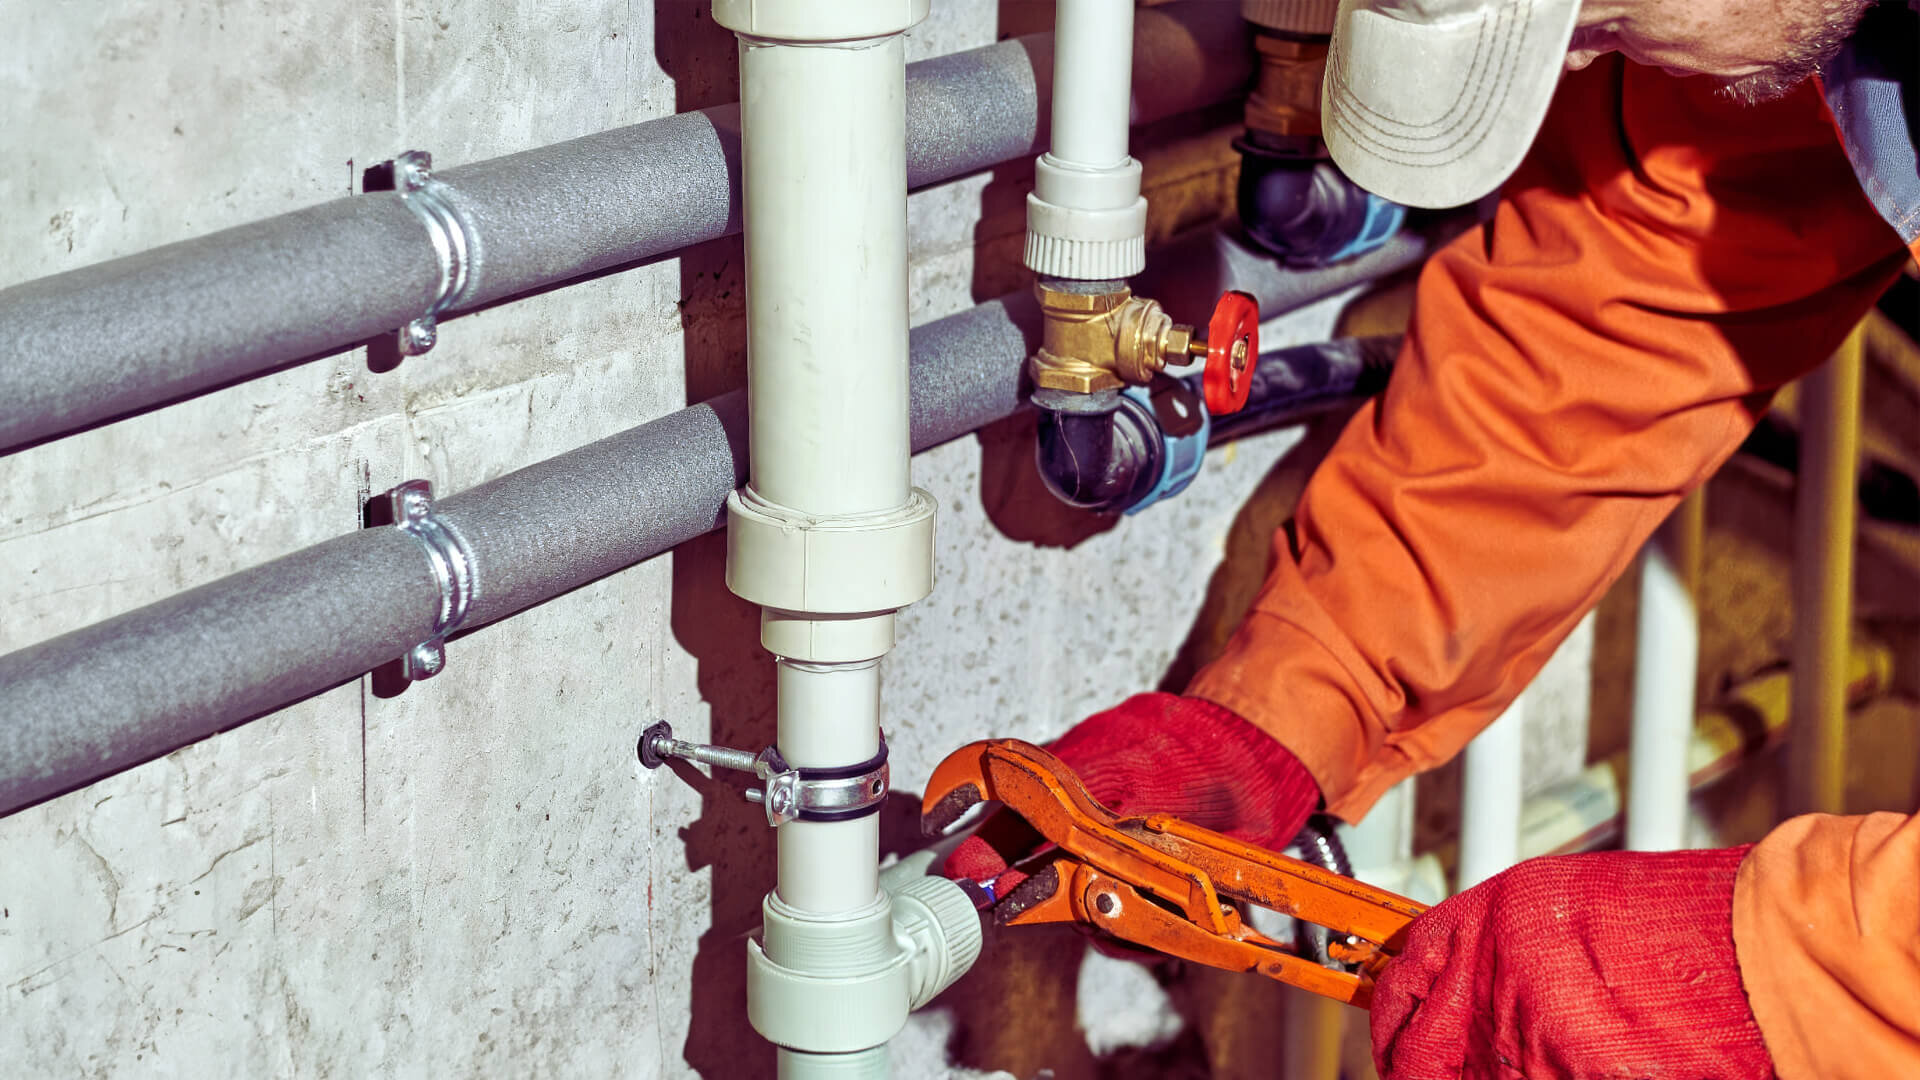
Plumbing and Home Safety: What Every Homeowner Should Know
Plumbing is often associated with the comfort and convenience of daily living. From running water to functioning toilets, a reliable plumbing system is something most people take for granted. However, beyond its practical benefits, plumbing plays a critical role in ensuring the overall safety of a home. Neglected or poorly installed plumbing can lead to hazardous conditions that affect health, structural integrity, and long-term livability. Understanding how plumbing impacts home safety helps homeowners stay proactive and avoid costly or dangerous consequences.
The Hidden Dangers of Water Leaks
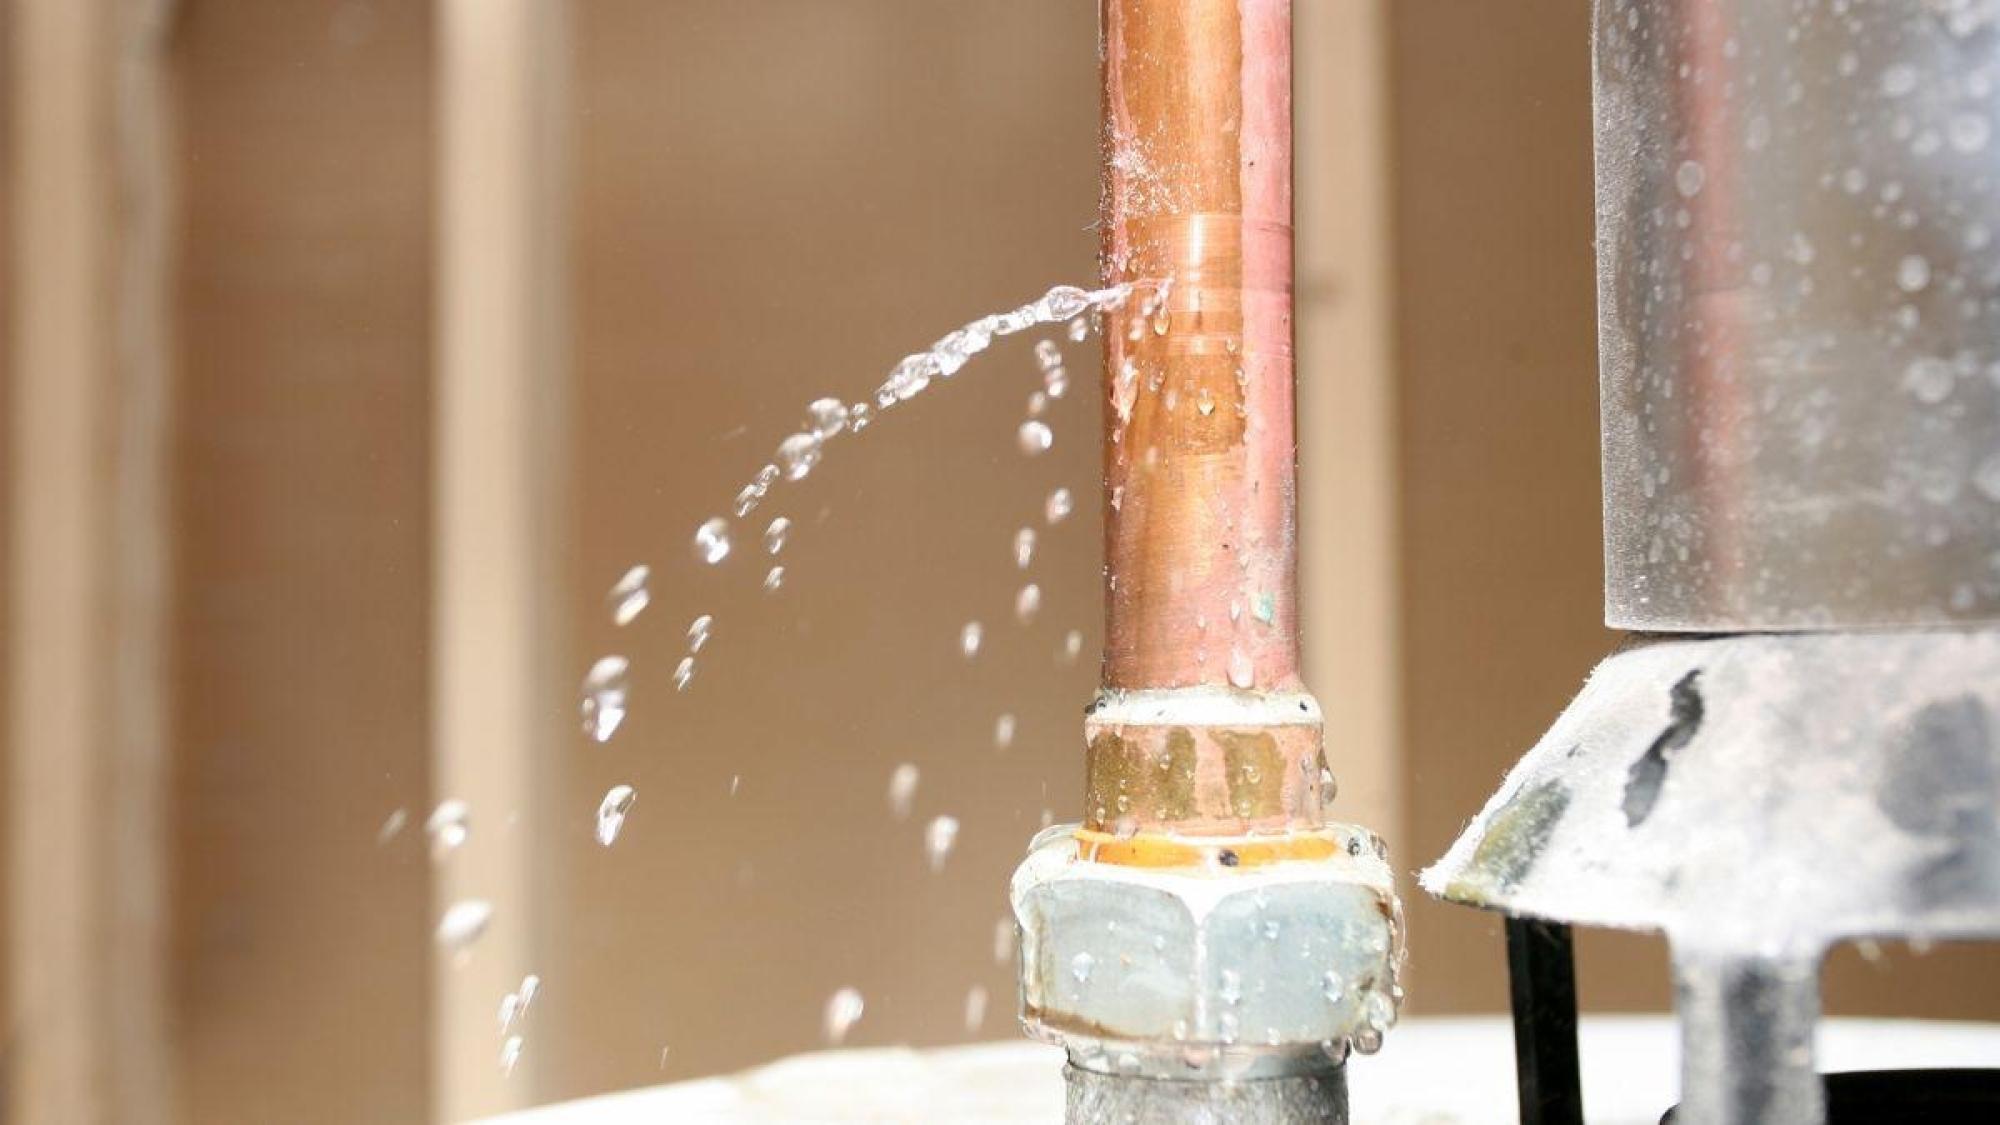 Water leaks are one of the most common plumbing issues, and they often go unnoticed until damage has already occurred. Leaky pipes can cause wood to rot, drywall to crumble, and insulation to lose its effectiveness. When water slowly seeps into unseen areas like behind walls or under floors, it creates an environment ripe for mold growth. Mold spores not only damage property but also pose significant respiratory health risks, especially to children and individuals with asthma or allergies.
Besides biological risks, water leaks can also compromise a home’s electrical systems. If water reaches wiring, outlets, or circuit panels, it can trigger electrical shorts or fires. Even small, persistent drips under sinks or behind appliances can become a threat over time. That’s why routine inspections and prompt repairs are essential.
Sewer Backups and Sanitation Risks
Another plumbing concern that can dramatically affect home safety is a sewer backup. When the main sewer line becomes clogged or damaged, wastewater may flow back into the home through sinks, showers, or toilets. This introduces harmful bacteria and contaminants into the living environment, presenting serious health hazards.
In addition to the immediate unsanitary conditions, sewer backups often result in extensive damage to flooring, furniture, and personal belongings. The cleanup process can be labor-intensive and expensive, and the emotional toll of losing cherished items is often overlooked. Preventing such incidents through regular maintenance of sewer lines, including proper disposal habits and tree root management, is critical.
Water Heater Safety and Scalding Prevention
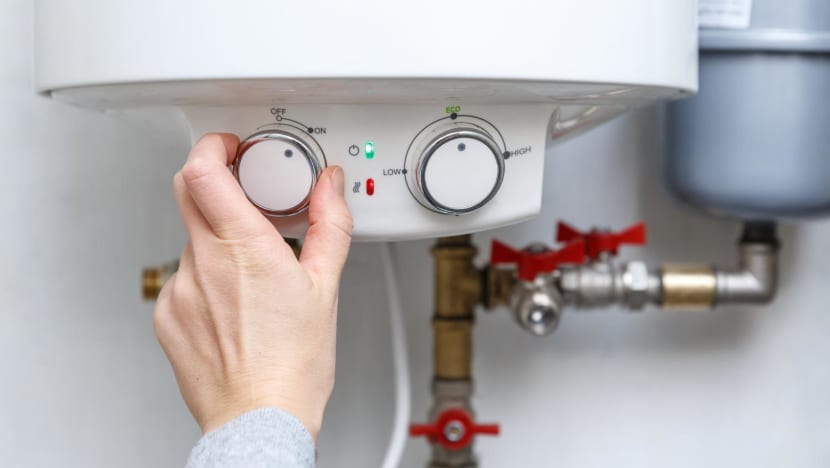 The water heater is another often-overlooked component of home plumbing that directly affects safety. Faulty water heaters can become ticking time bombs, especially if pressure relief valves are not functioning correctly. When pressure builds inside the tank and has no escape, the result can be an explosion or severe leak.
Temperature settings also matter. Water heaters that are set too high can cause scalding injuries, especially in households with young children or elderly family members. Safe temperature settings, usually between 120 and 130 degrees Fahrenheit, reduce the risk of burns without sacrificing comfort. It’s also important to have the unit inspected regularly for corrosion, sediment buildup, and general wear and tear to ensure it remains safe and efficient.
Gas Lines and Plumbing Cross-Connections
In homes with gas-powered water heaters, stoves, or heating systems, plumbing safety extends beyond water. Gas leaks can be deadly, and they are often associated with plumbing lines. A damaged or improperly sealed gas line can lead to carbon monoxide poisoning or even explosions.
Proper ventilation and gas leak detectors are essential safety features. Homeowners should also ensure that only licensed professionals handle any work involving gas plumbing. Additionally, plumbing cross-connections—where potable water lines connect with non-potable sources—must be carefully managed. These connections can lead to backflow, which contaminates clean water supplies with dirty or even toxic water. Devices like backflow preventers help keep the water supply safe and compliant with health codes.
Structural Damage from Plumbing Issues
Plumbing doesn’t just affect hygiene and convenience; it also plays a direct role in preserving the structural integrity of a home. Persistent leaks can weaken foundational elements, cause basement flooding, and damage load-bearing structures. Over time, what starts as a minor issue like a slow drip or occasional damp spot can lead to major repairs involving walls, flooring, and even the home’s foundation.
In colder climates, the risk of burst pipes during freezing weather is another serious concern. Water expands as it freezes, and pipes that are not properly insulated may crack or burst under pressure. A burst pipe can release gallons of water in a short time, overwhelming a home’s drainage capacity and leading to extensive water damage. Insulating pipes and taking precautions during winter months can help avoid this risk.
Plumbing and Indoor Air Quality
The connection between plumbing and indoor air quality might not be immediately obvious, but it is significant. Moist environments caused by leaks or poor drainage encourage the growth of mold and mildew. These substances release spores into the air, which can trigger allergic reactions, asthma attacks, and other respiratory issues.
Another concern is the presence of sewer gas in the home. If plumbing traps or venting systems are compromised, gases from the sewer system can enter the home’s interior spaces. These gases contain ammonia, hydrogen sulfide, and methane—all of which can affect indoor air quality and pose health risks. Proper trap maintenance and adequate plumbing ventilation are necessary to keep indoor air fresh and safe.
Safe Plumbing Design for Children and Elderly
A safe home should accommodate the needs of all family members, including the most vulnerable. Children and elderly individuals are more likely to be injured by plumbing issues such as scalding water, slippery surfaces due to leaks, or malfunctioning fixtures. Installing anti-scald devices, grab bars in bathrooms, and easy-to-operate faucets can enhance safety for everyone.
The design of plumbing fixtures also plays a role. Lever-style handles are easier for individuals with limited dexterity, and motion-sensor faucets help reduce the risk of forgetting to turn off the tap. Smart plumbing devices that monitor leaks and automatically shut off the water supply can provide peace of mind for families with dependents.
The Role of Professional Plumbing Inspections
While many plumbing issues reveal themselves through visible signs like stains, drips, or bad odors, others remain hidden until they become emergencies. That’s why periodic professional inspections are invaluable. A licensed plumber can detect issues that the average homeowner might miss, such as corrosion in supply lines, slow-draining sewer lines, or outdated components that no longer meet safety standards.
Preventative plumbing maintenance helps avoid emergencies, ensures code compliance, and protects both the property and its occupants. It’s a worthwhile investment that saves money and stress in the long run.
Smart Plumbing Technologies for Enhanced Safety
 Technology is also playing a growing role in plumbing safety. Today’s smart plumbing solutions can alert homeowners to leaks, monitor water usage, and even shut off the water supply in case of a detected issue. These systems are particularly useful in second homes or for homeowners who travel frequently, as they reduce the risk of returning to a flooded or damaged property.
Some systems can even learn typical water usage patterns and detect anomalies that might indicate a hidden leak or pipe failure. These innovations not only improve safety but also contribute to water conservation, a growing concern in many regions.
Emergency Preparedness and Plumbing Awareness
Being prepared for plumbing emergencies is an important part of overall home safety. Every household should know the location of the main water shut-off valve and how to use it. Quick action during a leak or pipe burst can minimize damage and prevent safety hazards.
It’s also helpful to keep basic plumbing tools and supplies on hand, such as a plunger, pipe wrench, and plumber’s tape. While not all problems can be solved without professional help, having some level of preparedness can prevent a small issue from becoming a major crisis.
Say Goodbye to Rust: Protecting Your Plumbing System for the Long Haul
Rust may seem like a minor inconvenience at first, but when it creeps into your plumbing system, the consequences can be costly, corrosive, and disruptive. It starts small—maybe you notice a reddish tint in your water or a metallic taste when you take a sip. Over time, though, rust can degrade pipes, damage appliances, stain fixtures, and ultimately lead to plumbing failure. Thankfully, rust isn’t inevitable. With the right strategies and awareness, you can safeguard your plumbing system and ensure clean, clear water flows through your home for years to come.
Understanding What Causes Rust in Plumbing
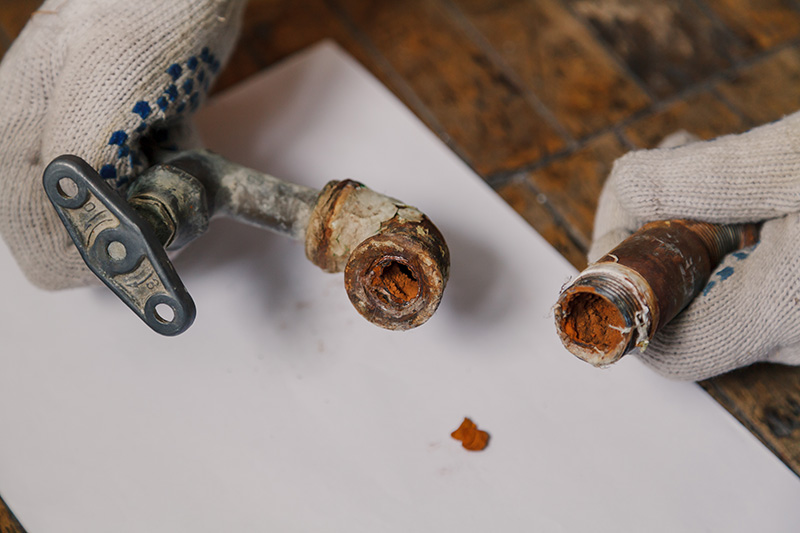 Rust develops when iron, oxygen, and moisture interact. In plumbing systems, this often means water reacting with the iron content in metal pipes, especially when protective coatings wear down or water chemistry is out of balance. Older galvanized steel pipes are particularly vulnerable, while newer systems using copper, PVC, or PEX are more resistant. However, rust can still form around fittings, joints, water heaters, and fixtures, so even modern systems need care and monitoring.
Another contributing factor is water quality. If your water supply has a high oxygen content, is slightly acidic, or contains minerals like iron, the chances of internal corrosion increase. Over time, these small chemical interactions can weaken pipes from the inside out, making rust not just a cosmetic problem, but a serious plumbing hazard.
Choosing the Right Materials from the Start
One of the most effective ways to prevent rust is to begin with rust-resistant materials. If you’re building a new home or remodeling an old one, consider using copper, PEX, or CPVC pipes. These materials do not rust and provide longevity and reliability under various water conditions. If you’re working with an older system that uses galvanized steel or cast iron, you may want to evaluate the long-term benefits of repiping.
Stainless steel is another option that resists corrosion better than standard steel due to the presence of chromium, which forms a protective layer on the surface. Though more expensive, stainless steel can be a good investment for fixtures or exposed plumbing parts prone to humidity.
Controlling Water Chemistry for Rust Prevention
The chemistry of your water plays a major role in whether rust will develop inside your pipes. If your water supply is naturally acidic or has high mineral content, it can accelerate corrosion. Installing a water softener or whole-home filtration system can help balance the pH level and remove minerals that contribute to rust. These systems not only help your plumbing last longer but also improve water taste and protect your appliances.
It’s also smart to test your water periodically. Local municipalities may provide reports, but having a private test can reveal specific information about iron levels, hardness, and acidity. Addressing these elements with the right filtration or treatment solutions can slow down rusting and keep your pipes clean.
Protecting Your Water Heater from Internal Rust
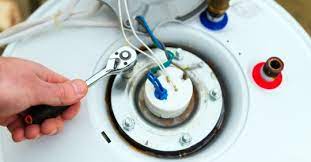 Water heaters are one of the most common places for rust to form, especially if they’re older or not maintained properly. Most tank-style water heaters contain a sacrificial anode rod—usually made of magnesium or aluminum—which corrodes over time to protect the steel tank. Once this rod is completely corroded, the tank itself begins to rust.
Replacing the anode rod every few years is a simple but effective maintenance task that can extend your water heater’s life significantly. Regular flushing of the tank to remove sediment buildup is also essential. Sediment can trap moisture against the interior walls of the tank and accelerate rusting.
If your water heater is nearing the end of its expected life, upgrading to a newer model—especially a tankless system that doesn’t store water—can drastically reduce the risk of rust.
Managing Moisture in Utility Areas
Where there’s moisture and metal, there’s a risk of rust. Many homeowners overlook the humidity levels in basements, crawlspaces, and utility rooms, where exposed plumbing is often located. These areas can trap moisture, especially in humid climates or poorly ventilated homes. Over time, this creates a breeding ground for corrosion.
Dehumidifiers, proper insulation, and good airflow can help control moisture levels and prevent rust on exposed pipes and fittings. Wrapping pipes in insulation not only protects them from condensation but also helps regulate their temperature during extreme weather, reducing stress on the system.
Regular Inspections Can Catch Rust Early
Prevention often starts with awareness. Regularly inspecting your plumbing system can help you catch early signs of rust before they turn into major issues. Look for discolored water, especially reddish-brown hues when you turn on taps. Keep an eye on fixtures for any rust stains or water leaks. Unusual sounds like banging or gurgling in the pipes may also signal internal corrosion or buildup.
Hiring a professional plumber to conduct a full inspection every few years is a wise investment. They can identify vulnerable areas, assess water quality, and recommend upgrades or treatments that prevent rust from gaining a foothold.
Avoiding DIY Mistakes That Invite Rust
In an effort to save money, many homeowners turn to DIY plumbing repairs. While some tasks are simple enough, improper installation of fittings, mismatched materials, or ignoring galvanic corrosion can inadvertently cause rust. Galvanic corrosion happens when dissimilar metals (like copper and steel) are joined without proper insulation or connectors, leading to accelerated rusting at the point of contact.
If you must perform a DIY repair, make sure to use compatible materials and appropriate connectors. When in doubt, consulting a professional can prevent a small mistake from turning into a rust-ridden disaster.
Addressing Leaks Immediately
Even the smallest leak can contribute to rust over time. Dripping water may not seem urgent, but when it consistently contacts metal surfaces, it accelerates corrosion. Whether it’s under the sink, around a hose bib, or at the base of a water heater, leaks need immediate attention.
Beyond the damage caused to the pipe itself, leaks can encourage rust in surrounding areas—wall studs, flooring, and fasteners may all be at risk. Prompt repairs reduce not just water waste but the chances of extensive rust and mold damage.
Keeping Outdoor Plumbing Protected
Exterior spigots, irrigation systems, and hose bibs are particularly vulnerable to rust because of their exposure to the elements. Rain, snow, and temperature fluctuations all create conditions where rust thrives. Covering outdoor faucets during winter, insulating above-ground pipes, and using rust-resistant fittings can help reduce exposure.
Drain any outdoor plumbing systems before winter to prevent freeze-thaw damage, which can crack pipes and expose fresh metal surfaces to oxidation once temperatures rise.
Using Rust Inhibitors and Coatings
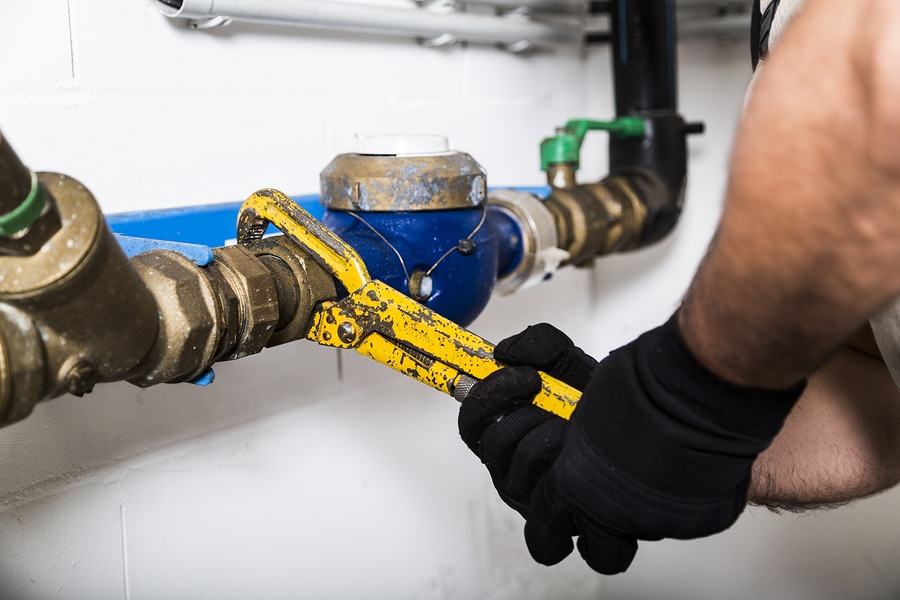 In certain high-humidity environments, an extra layer of protection can make all the difference. Rust inhibitors and protective coatings can be applied to exposed metal plumbing parts to create a barrier against moisture and oxygen. These sprays or brush-on coatings are often used in basements, garages, and outdoor installations to enhance durability.
While these products are not a substitute for proper materials or maintenance, they can be part of a broader strategy to keep rust at bay—especially in vulnerable or hard-to-replace areas.
Recognizing When It’s Time to Replace
No plumbing system lasts forever, and rust can be a clear indicator that replacement is necessary. If you’re constantly dealing with leaks, water discoloration, or corroded pipes, it may be more cost-effective to repipe part or all of the system. Older homes with galvanized pipes are especially prone to hidden rust, and the degradation inside the pipe walls can be extensive before symptoms become visible.
Replacing old plumbing isn’t just about preventing rust—it improves water pressure, enhances water quality, and increases property value. Though the upfront cost can be significant, the long-term benefits often justify the investment.
Beating the Buildup: How to Combat Plumbing Scale Effectively
Hard water is a quiet troublemaker. Over time, its high mineral content—primarily calcium and magnesium—leaves behind a trail of stubborn scale inside your pipes and appliances. Known as limescale or mineral scale, this chalky residue might seem harmless at first, but left unchecked, it can lead to reduced water pressure, pipe corrosion, clogged fixtures, and higher utility bills. The good news is that there are proven strategies to combat plumbing scale buildup and protect your home’s water system from long-term damage.
Understanding Why Scale Forms
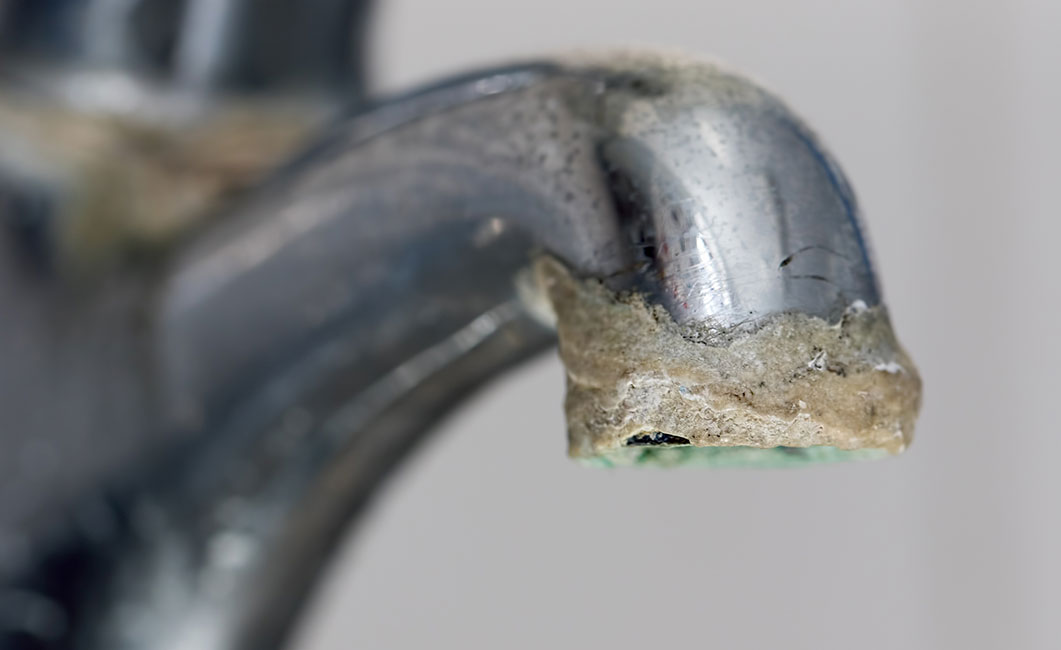 Plumbing scale is most commonly a result of hard water. As water flows through your pipes, it carries dissolved minerals with it. When the water is heated or sits stagnant, these minerals begin to solidify and cling to the inner walls of your plumbing system. Over time, this creates a crusty layer of scale that continues to build up with each water cycle.
Homes located in regions with naturally hard water are especially vulnerable to scale-related problems. While municipal treatment plants do remove some hardness, they typically don’t soften water to the extent needed to fully prevent scale formation. The hotter the water, the more aggressively the minerals deposit onto surfaces, which is why scale often shows up in water heaters, kettles, dishwashers, and showerheads.
Signs Your Plumbing Is Suffering from Scale
Before scale becomes a major issue, you’ll likely notice a few tell-tale signs. Reduced water pressure, particularly in showers and faucets, can signal that mineral deposits are narrowing the pipe diameter. Appliances like dishwashers and washing machines may take longer to complete cycles or fail to clean thoroughly. White spots on dishes and glassware, crusty buildup on fixtures, and soap that refuses to lather are all warnings of hard water’s presence.
In severe cases, the buildup can block flow entirely or trigger leaks as it weakens pipe joints. That’s why it’s essential not to ignore these signs and take action before scale inflicts permanent damage on your system.
Starting with Water Testing
The first step in managing scale is understanding your home’s water quality. A professional water test will measure hardness levels and indicate whether you’re dealing with moderately hard or extremely hard water. This information is crucial for selecting the right scale prevention method. Home testing kits are available for basic readings, but more comprehensive lab tests can provide a detailed breakdown of mineral content and other water characteristics.
Once you’ve confirmed hard water as the culprit, you can begin exploring the most suitable treatment options for your plumbing system.
Softening the Water Supply
Installing a water softener is one of the most effective ways to prevent scale buildup. These systems use ion exchange technology to replace calcium and magnesium ions with sodium or potassium ions. As a result, the softened water flows more freely through pipes without depositing minerals.
There are different types of softeners, including salt-based, salt-free, and magnetic or electronic conditioners. Salt-based systems are highly efficient and popular, though they require regular maintenance to replenish salt. Salt-free softeners, on the other hand, don’t remove minerals but instead alter their structure to reduce their ability to stick to surfaces.
A water softener installed at the point of entry ensures that all water entering the home is treated, providing comprehensive protection for your plumbing and appliances.
Using Chemical Descalers Safely
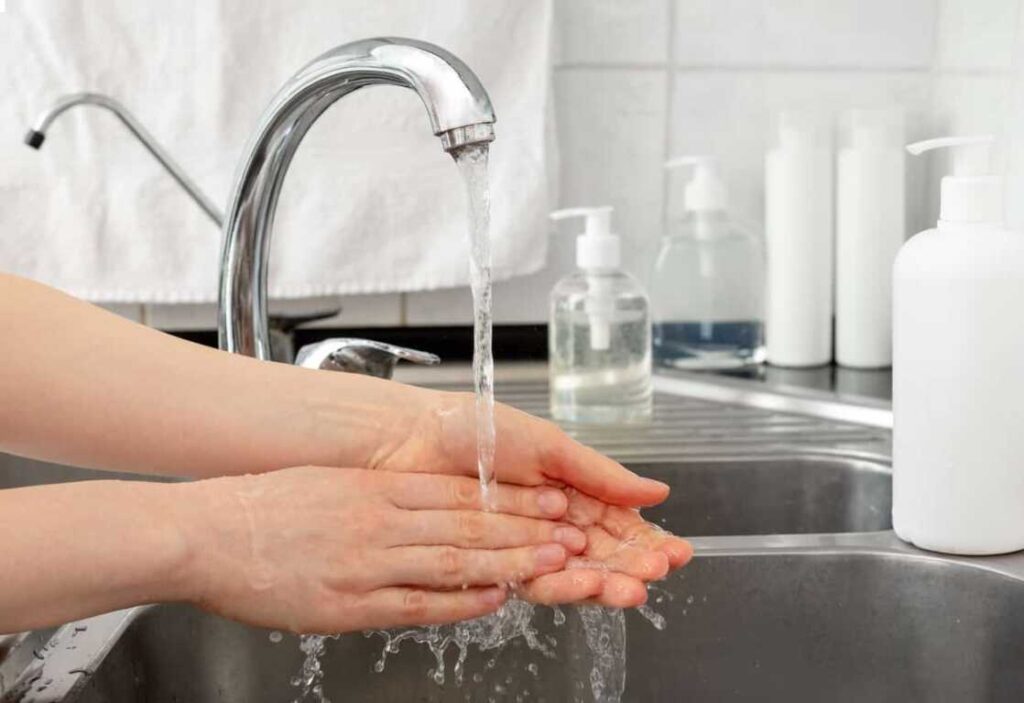 For homes already experiencing buildup, chemical descalers can provide a short-term solution. These specially formulated cleaners dissolve scale from the inside of pipes and fixtures. They are particularly useful for water heaters, faucets, and showerheads, where scale tends to accumulate most.
Descalers come in various formulations and should be used according to manufacturer instructions. It’s important to flush the system thoroughly after treatment to remove any remaining chemicals, especially if they’re not designed to be left in the system.
While chemical descalers can’t replace long-term preventive solutions, they can help restore flow and performance when used periodically.
Adopting a Preventive Maintenance Routine
Keeping scale at bay also involves regular maintenance. Cleaning fixtures, showerheads, and faucets with vinegar or lemon juice can help remove early deposits before they harden. Flushing your water heater annually is another valuable step, as sediment tends to settle at the bottom of the tank and solidify over time.
For tankless water heaters, descaling should be done every six to twelve months depending on your water hardness. Most manufacturers recommend using a vinegar solution or a specialized descaling pump kit to perform this task safely and effectively.
Prevention doesn’t stop at cleaning, though. Watching for early signs of buildup and addressing them immediately ensures that minor scale deposits don’t become major plumbing issues.
Upgrading to Scale-Resistant Fixtures
Another smart approach to fighting scale is installing plumbing fixtures and appliances that are designed to handle hard water. Modern taps, showerheads, and even dishwashers now feature scale-resistant coatings or self-cleaning nozzles that minimize the impact of mineral buildup.
Some advanced plumbing materials, such as cross-linked polyethylene (PEX) and certain types of PVC, are less prone to internal corrosion and scale adhesion compared to older copper or galvanized pipes. If you’re renovating or replacing sections of your plumbing, using scale-resistant materials can pay dividends in the long run.
Additionally, certain electric or magnetic devices can be installed on main water lines to reduce scale formation. Though their effectiveness varies depending on water chemistry and installation conditions, many homeowners report satisfactory results when these systems are combined with other scale-control strategies.
Considering Whole-House Filtration Systems
Beyond softening, whole-house water filtration systems provide a comprehensive solution for treating hard water along with other contaminants. These systems typically combine multiple filtration stages—sediment filters, activated carbon, and sometimes softening resin or scale inhibitors.
By installing a whole-house filter, you not only reduce scale but also improve the overall quality of your water, removing chlorine, organic compounds, and sediments that could exacerbate plumbing wear. It’s especially useful in areas where both hardness and chemical impurities are common in tap water.
Filter maintenance is vital to keep the system functioning correctly. Most systems include pressure gauges or indicators that alert you when it’s time to replace cartridges or media.
Monitoring and Adjusting Over Time
Combating scale isn’t a one-time task—it requires consistent monitoring. Water hardness levels can vary seasonally or after changes to municipal water supplies. That’s why it’s a good idea to test your water annually, even after implementing treatment measures.
Keep track of how often appliances need cleaning or servicing. If scale starts reappearing faster than expected, it might be time to reevaluate your setup or increase the frequency of maintenance steps like flushing or descaling.
Also consider lifestyle changes that might affect water use, such as a growing household or the installation of new appliances. These factors can place additional demands on your plumbing system and may require adjustments to your current treatment methods.
Improving Water Efficiency to Minimize Scale
Limiting water waste isn’t just good for the environment—it also reduces opportunities for scale to form. Using high-efficiency appliances and low-flow fixtures means water moves more steadily and is less likely to stagnate and deposit minerals. Temperature control also plays a part; by lowering the thermostat on your water heater, you reduce the heat-driven crystallization of minerals, which is the main cause of scale formation.
Additionally, insulating hot water pipes keeps temperatures more stable and prevents the drastic changes that contribute to scale. Making these simple adjustments can support your overall scale prevention strategy and prolong the life of your plumbing infrastructure.
Balancing Cost and Effectiveness
While some solutions like descalers or shower filters are relatively affordable, whole-home systems and softeners can represent a significant investment. It’s important to weigh the cost of scale-related damage and repairs against the price of installing preventive equipment. In most cases, the long-term savings from reduced maintenance, longer appliance life, and lower energy consumption justify the upfront expense of quality water treatment systems.
Consulting with a licensed plumber or water treatment specialist can help you choose the best solution based on your home’s needs and your water profile. They can also ensure that equipment is installed properly and provide guidance on maintaining it over time.
Say Goodbye to Smelly Drains: Effective Plumbing Fixes
Unpleasant odors wafting from plumbing drains can quickly sour the atmosphere of any home, turning kitchens and bathrooms from refreshing spaces into sources of discomfort. These smells are not only a nuisance but also signs of underlying plumbing issues that need attention. Fortunately, there are effective solutions that can restore freshness and functionality to your home’s drainage system. Understanding the causes, knowing how to address them, and preventing future occurrences are all crucial in dealing with smelly plumbing drains.
Understanding Why Drains Smell
 The first step in solving smelly drain problems is to understand what’s causing them. In most cases, odors are the result of organic material, such as food particles, grease, hair, or soap scum, becoming trapped in the drainpipes. Over time, bacteria feed on this debris, releasing foul gases. In some situations, the issue might be more complex, like a dried-out P-trap, venting problems, or even sewer line backups. Recognizing the source of the smell is essential to applying the right solution.
Kitchen Drain Odors and Food Residue
In kitchens, the buildup of food particles and grease is the most common culprit. Cooking oils and fats may go down the drain in liquid form, but they quickly cool and solidify in the pipes. This creates a sticky residue that traps other debris, resulting in decay and an unmistakable rotten smell. Over time, this environment becomes a breeding ground for odor-causing bacteria.
Using hot water alone may not be sufficient to clear the buildup, especially if grease has hardened along the pipe walls. A more thorough cleaning, sometimes with natural enzymatic drain cleaners or a vinegar and baking soda solution, may be needed to dissolve and dislodge the organic matter effectively. Avoid pouring boiling water if you have PVC pipes, as extreme heat could cause damage.
Bathroom Drain Odors and Hair Accumulation
In bathrooms, the smell often comes from hair, soap scum, and toothpaste that have combined into a slimy mass within the drain. Shower and bathtub drains, in particular, are notorious for these issues. As the gunk collects, it supports microbial activity that releases an earthy, sulfur-like odor. Unpleasant smells from sink drains can also stem from cosmetic or hygiene products that settle in the plumbing and degrade over time.
Regularly removing hair from drain covers and flushing with warm water helps minimize buildup. Some people use a bent wire hanger or plastic drain snake to pull hair out of the drain. While not a pleasant task, it can dramatically reduce odors and prevent clogs.
P-Trap Problems and Dry Drains
The P-trap is a curved section of pipe designed to hold water and prevent sewer gases from coming back into the home. If this trap dries out, either due to infrequent use or evaporation, the barrier disappears, and foul air from the sewer system may seep into the house.
This is particularly common in guest bathrooms or basement utility sinks that are rarely used. A simple fix is to run water into the drain regularly to refill the P-trap. Adding a small amount of mineral oil after the water can also slow evaporation. For drains that are never used, covering them or sealing them off entirely might be more effective.
Blocked or Improper Venting Systems
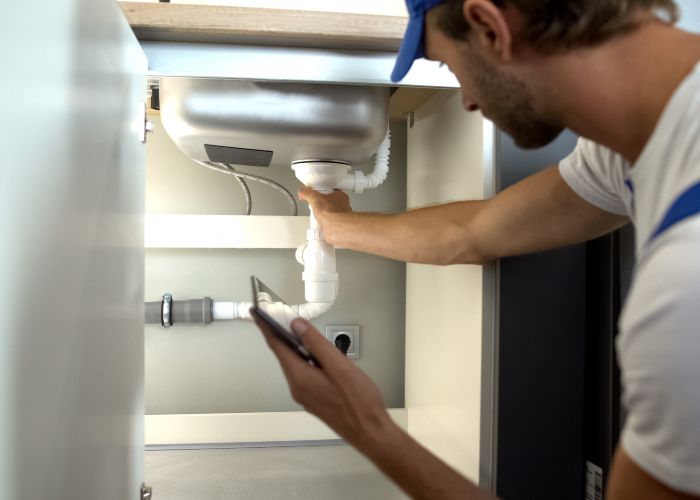 Every plumbing system is equipped with vents that allow sewer gases to escape safely through the roof rather than re-entering the living space. If these vents become blocked by debris, bird nests, or snow, or if they are improperly installed, the gases can build pressure and force their way back into the home through the drains.
In such cases, resolving the issue may require climbing onto the roof to check the vent openings or hiring a plumber with specialized inspection tools. Ensuring proper airflow in the vent system is essential to keeping the pressure balanced and the smells out.
Sewer Line and Septic Tank Issues
When the smell from a drain is especially strong and seems to come from multiple fixtures, the problem could lie in the main sewer line. Tree roots, broken pipes, or blockages in the line can cause sewage to back up, sometimes even resulting in waste surfacing in the home. Similarly, if your home is on a septic system, a full or malfunctioning tank can produce unpleasant odors both inside and outside the home.
These issues usually require professional attention. Sewer cameras and pressure testing can identify the location and nature of the blockage. If a septic tank is the cause, it may need pumping or repair. Addressing these serious concerns promptly is vital for health and safety.
Mold and Mildew Growth Around Drains
Sometimes the smell might not be coming from within the drainpipe at all but from the surrounding areas. Leaks in the plumbing under a sink or around a shower drain can promote mold and mildew growth. These fungi produce musty odors that are easily mistaken for drain issues.
Checking for moisture around plumbing connections, warped cabinets, or soft flooring can reveal hidden leaks. Fixing these leaks and cleaning the mold with appropriate agents can eliminate lingering smells and prevent structural damage.
Using Natural Remedies Safely
For mild to moderate odors, many homeowners prefer natural cleaning remedies over harsh chemicals. A combination of baking soda and vinegar is a classic method for deodorizing drains. Pouring half a cup of baking soda followed by a cup of vinegar into the drain creates a fizzy reaction that helps dislodge debris and neutralize smells. After letting it sit for about 30 minutes, flushing the drain with hot water clears out the loosened material.
Citrus peels can also help freshen kitchen drains. Grinding them in a garbage disposal (if present) releases natural oils that combat foul smells. However, caution is needed with citrus if you have older plumbing, as the acidity could affect certain materials.
Avoiding Harsh Chemical Use
While chemical drain cleaners may seem like a quick fix, they come with risks. Many of them contain lye or acid, which can damage pipes, especially if used frequently. They can also be hazardous to health if fumes are inhaled or if there is skin contact.
If you do choose to use a chemical product, follow the instructions precisely and ensure good ventilation. Avoid mixing different cleaners, as chemical reactions can occur. If the drain remains smelly or slow after treatment, it’s time to consult a professional.
Routine Drain Maintenance
Keeping your drains odor-free is easier with consistent maintenance. Running hot water down the sink after every use can help push debris through the pipes. Using a drain strainer catches food and hair before it enters the plumbing. Monthly treatments with natural enzymatic cleaners or vinegar solutions help maintain a healthy drain environment.
Avoiding putting grease, coffee grounds, and stringy vegetables into kitchen drains also prevents buildup. In bathrooms, taking a few seconds after showers to remove visible hair from the drain can go a long way in preventing clogs and odor.
When to Call a Plumber
 Some smelly drain problems require expert intervention. If odors persist after cleaning, or if they are accompanied by slow drainage, gurgling sounds, or water backups, it may indicate a more serious issue within the plumbing system. A licensed plumber has the tools and expertise to diagnose the problem and perform thorough cleaning, repair damaged pipes, or clear blockages deep within the system.
Plumbers may use hydro jetting equipment to clear out years of built-up grime and sludge or conduct camera inspections to identify pipe damage or obstructions. Attempting to fix these issues without the proper tools could cause more harm than good.
Improving Ventilation and Air Quality
In some homes, poor bathroom or kitchen ventilation can trap smells and make them seem worse. Installing or upgrading exhaust fans in moisture-heavy areas can help circulate air and prevent odor buildup. Opening windows or using dehumidifiers can also reduce dampness and eliminate musty air.
Scented candles and air fresheners may mask odors temporarily, but they do not solve the root of the problem. Clean air begins with clean drains and well-functioning plumbing.
Fixing Low Water Pressure: A Complete Plumbing Guide
Low water pressure in your home can disrupt daily life in more ways than one. Whether it’s a weak stream from the shower, a slow-filling washing machine, or a faucet that takes forever to rinse a dish, poor water pressure is more than just a minor annoyance—it’s a plumbing issue that signals deeper concerns within your water system. Tackling low water pressure requires understanding the causes and applying the right solutions to restore flow efficiency and household comfort.
Identifying the Symptoms of Low Water Pressure
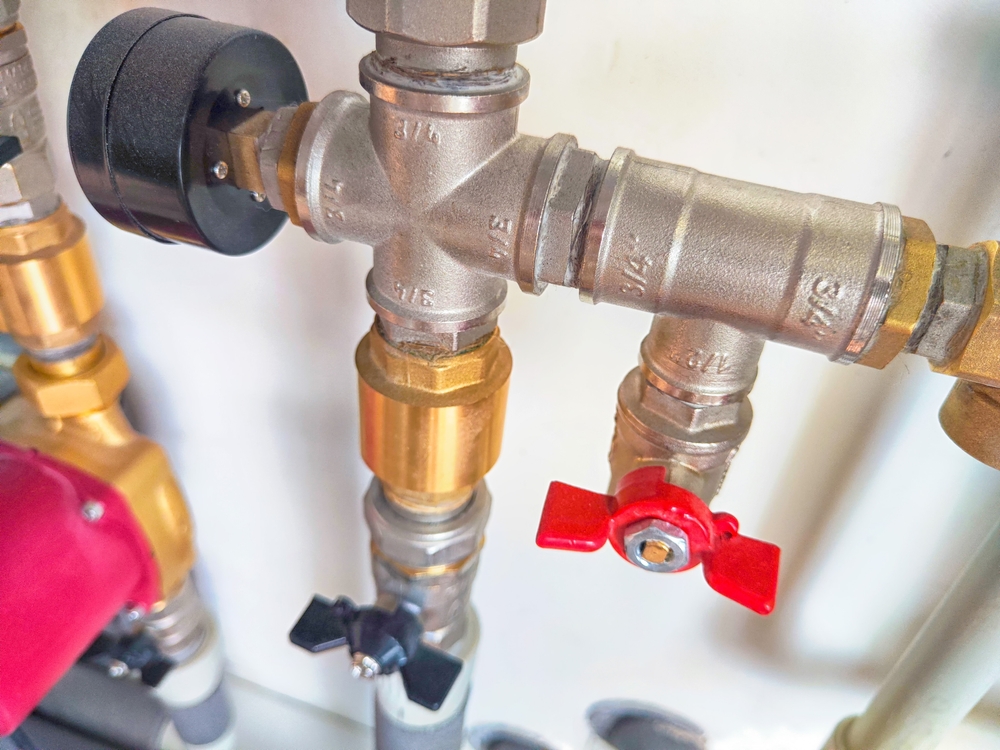 Before diving into repairs or replacements, it’s important to confirm whether the issue is actually low water pressure or something else mimicking it. Weak water flow in one area might be due to a clogged fixture, while low pressure throughout the house could indicate a broader system issue. Consistent reduction in pressure across all faucets often points to systemic concerns such as pipe corrosion, a malfunctioning pressure regulator, or even municipal supply problems.
Sometimes the pressure issue is isolated to hot or cold water, suggesting that the problem may lie with the water heater or a specific supply line. Observing these patterns will help narrow down where the problem begins, guiding the path toward effective solutions.
Understanding the Common Causes
One of the most frequent causes of low water pressure is sediment build-up within the plumbing system. Over time, minerals from hard water can accumulate inside pipes and fixtures, reducing flow space and restricting water delivery. Another culprit can be leaks within the plumbing network. Even small leaks lead to water escaping before reaching the intended outlet, resulting in a drop in pressure.
Pressure regulators can also wear out over time. These devices are meant to keep water pressure consistent and safe, but when they fail, they can either limit or overload pressure levels. If the regulator is faulty, homeowners may notice sudden shifts in water behavior, either too weak or too forceful.
Corrosion is a less visible but serious issue, especially in homes with older galvanized steel plumbing. Rusting pipes narrow over decades, eventually choking off flow. In many older homes, this can be a major reason behind consistently low water pressure.
Checking Water Pressure at the Source
One of the first steps in resolving low pressure is to measure the water pressure with a gauge. This device attaches to an outdoor spigot and gives a baseline reading of your system’s PSI (pounds per square inch). A typical home should have a pressure reading between 45 and 80 PSI. Readings below 40 PSI confirm there’s a pressure issue worth investigating further.
If the pressure is low at the source, the problem could lie in the main water supply, either from the municipal service or a well system. Municipal systems sometimes experience drops due to nearby construction, infrastructure issues, or peak usage times. In such cases, the solution may lie outside the home’s plumbing and require coordination with the utility provider.
Cleaning Fixtures and Aerators
Sometimes, what seems like a low pressure issue is really just clogged fixtures. Faucets and showerheads contain small screens called aerators that can become blocked with mineral deposits and debris. Removing and cleaning these parts can often restore normal flow in specific areas of the home.
Soaking the components in vinegar is a common and effective solution. This dissolves mineral build-up and loosens debris, allowing the water to flow freely once reassembled. Regular maintenance of aerators can prevent the gradual decline in pressure and ensure steady performance.
Inspecting and Replacing Pressure Regulators
The pressure regulator plays a crucial role in managing water pressure entering the home. If this device fails or becomes blocked, it can cause uneven or insufficient pressure throughout the household. Located near the main shut-off valve, the regulator can be tested and adjusted, though in many cases it may need to be replaced.
It’s important not to attempt adjustments without some technical knowledge, as improper handling could lead to pipe damage or even violations of local plumbing codes. Professional plumbers can test, recalibrate, or replace a faulty regulator and ensure everything is up to standard.
Addressing Pipe Leaks and Damage
Leaks, even small ones, can drastically affect water pressure. Pipes that are cracked, punctured, or separated allow water to escape before reaching the tap. In homes with older plumbing, these leaks can occur behind walls or under floors, making them difficult to detect.
Look for signs such as damp drywall, unusual mold growth, or unexplained water spots, all of which suggest a leak may be present. In more serious cases, a plumber might use pressure testing or thermal imaging tools to locate hidden leaks. Replacing damaged sections or re-piping may be necessary to restore optimal water flow.
Replacing Corroded or Outdated Pipes
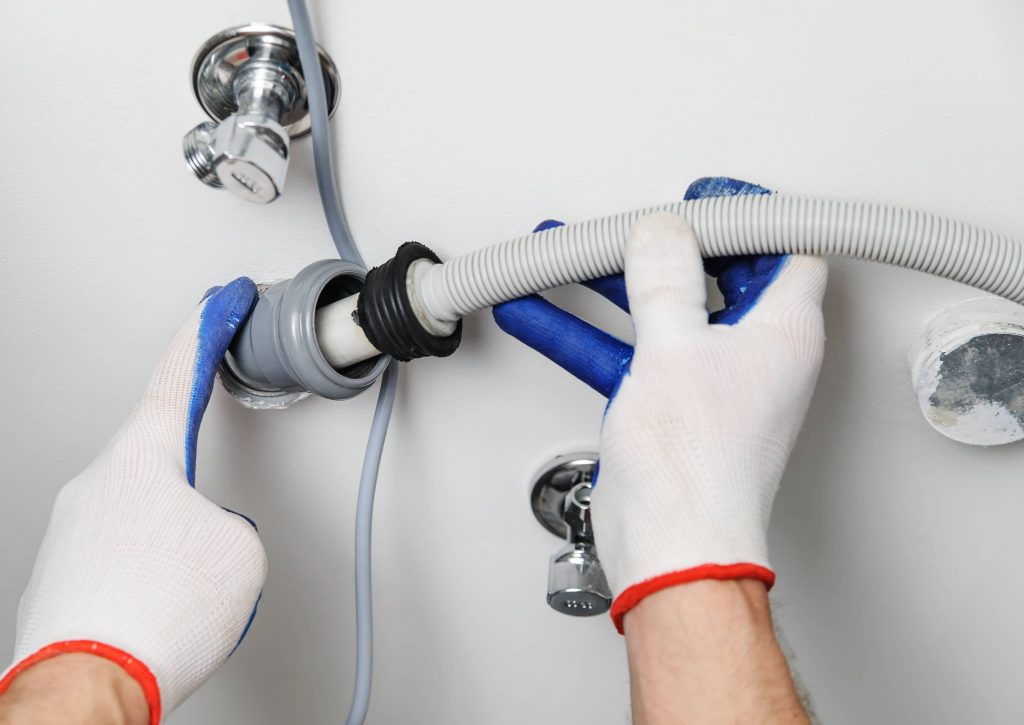 Homes with galvanized steel pipes are more likely to experience long-term corrosion, which leads to pressure loss. As pipes age, internal rust narrows the flow path, resulting in a slow, uneven water supply. Upgrading to modern materials like copper, PEX, or CPVC can significantly improve pressure and water quality.
Replacing plumbing is a major investment, but it can save money in the long run by preventing leaks, water damage, and future performance issues. It also brings the plumbing system up to current safety and efficiency standards.
Enhancing Pressure with a Booster Pump
In some homes, especially those located at the end of a municipal line or on elevated ground, naturally low water pressure may be unavoidable. In these cases, installing a water pressure booster pump can provide a practical solution. Booster pumps increase incoming pressure to acceptable levels and ensure consistent flow across all fixtures.
These systems are typically installed at the point where water enters the home. A pressure tank may also be added to reduce pump cycling and maintain even pressure. While this option comes with an upfront cost, it can drastically improve day-to-day functionality for homes with chronically low pressure.
Maintaining a Balanced Plumbing System
Preventing low pressure issues in the future depends on regular maintenance and proactive plumbing care. Flushing the water heater annually can remove sediment build-up that affects both temperature and pressure. Water softeners can help reduce mineral deposits in hard water areas, keeping pipes and fixtures cleaner for longer.
Monitoring the system for signs of wear—like discoloration, staining, or inconsistent flow—can help address small issues before they escalate. In larger homes, especially those with complex plumbing configurations, periodic inspections from licensed plumbers can be invaluable.
When to Seek Professional Help
Not all pressure problems are easily solved with DIY efforts. If symptoms persist even after cleaning fixtures, checking the regulator, and inspecting for visible leaks, it’s best to contact a plumbing professional. They can conduct a full system inspection and identify problems that may not be visible or easily accessible.
Complex fixes like full pipe replacements, pressure tank installations, or regulator upgrades require specialized tools and expertise. Attempting these repairs without proper knowledge can lead to further damage or compliance issues. A certified plumber ensures safety, durability, and efficiency in resolving the issue.
Revamping Old Plumbing: A Modern Makeover for Aging Systems
Upgrading outdated plumbing can significantly enhance the functionality, safety, and efficiency of any home or building. Old plumbing systems, often made from galvanized steel or cast iron, are prone to leaks, corrosion, and inefficiency. With advancements in plumbing materials and technologies, modernizing an old system isn’t just a necessity—it’s a smart investment. This guide explores practical approaches to upgrading your existing plumbing infrastructure while embracing modern innovations and ensuring long-term reliability.
Recognizing the Signs of Outdated Plumbing
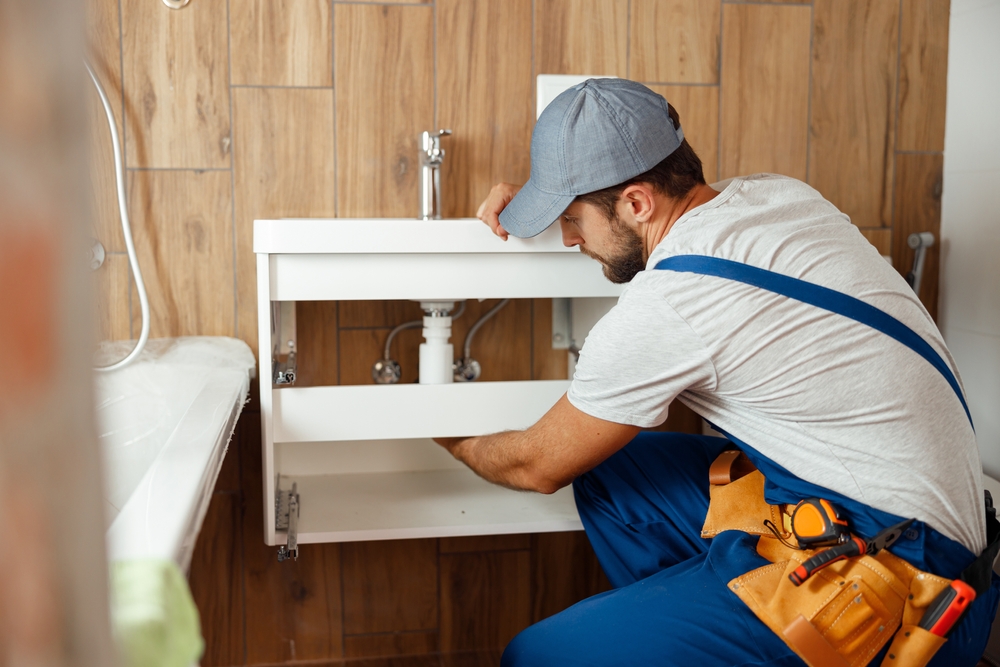 Before embarking on any plumbing upgrade, it’s essential to understand what makes a plumbing system outdated. Discolored water, low water pressure, persistent leaks, and strange noises in the pipes are common signs that demand attention. In many cases, homes built before the 1970s may still have galvanized steel pipes, which are particularly susceptible to internal corrosion and buildup. Recognizing these symptoms is the first step toward a successful modernization project.
Evaluating the Existing System Thoroughly
A comprehensive inspection is necessary to determine the scope of work required for a plumbing upgrade. This evaluation should include a visual examination of exposed pipes, a pressure test, and a camera inspection of the sewer lines. This process reveals the materials currently in use, the condition of the pipes, and any potential blockages or structural damage. This step helps avoid unnecessary replacements and allows homeowners to target the most critical problem areas.
Choosing the Right Modern Materials
Today’s plumbing materials offer better durability, corrosion resistance, and performance compared to traditional piping. Copper remains a reliable choice for its longevity and antimicrobial properties. However, many homeowners now opt for PEX (cross-linked polyethylene) due to its flexibility, ease of installation, and resistance to scale and chlorine. PVC and CPVC are also common choices, especially for drain and vent systems. Selecting the appropriate materials is crucial to ensure the upgraded system meets the specific needs of the home while remaining compliant with building codes.
Planning for Minimal Disruption
One of the challenges in modernizing old plumbing systems is minimizing disruption to daily life. Depending on the scope of the upgrade, it might not be feasible to replace every pipe in the house at once. A phased approach allows for section-by-section replacement, reducing the inconvenience to occupants. Strategically planning replacements around bathrooms, kitchens, and laundry areas ensures continued access to essential plumbing fixtures during the upgrade process.
Reconfiguring for Modern Usage Needs
Older homes were designed with different water usage patterns in mind. Modern families typically use more water and expect consistent pressure and temperature control. Upgrading your plumbing system provides an opportunity to reconfigure pipe layouts to support multiple simultaneous uses. For instance, installing separate supply lines for each major appliance or bathroom can help maintain steady pressure and avoid temperature fluctuations during showers or dishwashing.
Incorporating Energy-Efficient Fixtures
A plumbing modernization project also presents the perfect chance to introduce water-saving and energy-efficient technologies. Low-flow showerheads and faucets reduce water consumption without compromising performance. Dual-flush toilets and tankless water heaters contribute to energy conservation while enhancing comfort. These upgrades are not only environmentally responsible but also offer potential savings on monthly utility bills over time.
Upgrading the Water Heater System
Traditional water heaters with large storage tanks are being steadily replaced by modern alternatives that provide better efficiency and space savings. Tankless water heaters deliver hot water on demand, eliminating standby heat loss and providing a continuous supply. In some cases, hybrid water heaters that use heat pump technology can also be an effective solution. Replacing the old water heater during a plumbing system upgrade ensures compatibility and maximizes energy savings.
Addressing Drainage and Ventilation Issues
Modern plumbing upgrades should not overlook the drainage and venting systems. Poorly vented drains can lead to gurgling sounds, slow drainage, and foul odors. Updating vent stacks and ensuring adequate air flow helps improve system performance and prevent blockages. Likewise, old cast iron drains prone to rust and buildup should be replaced with newer PVC or ABS systems to improve flow and longevity.

Installing Smart Plumbing Technology
Technology has revolutionized plumbing in recent years. From smart leak detectors that send alerts to your phone to automatic shut-off valves that prevent water damage, integrating smart devices adds a layer of protection and convenience. Homeowners can also install digital water monitors that track consumption and help identify hidden leaks. Including these upgrades during a plumbing modernization project makes the entire system more responsive and efficient.
Understanding Code Compliance and Permits
Modern plumbing upgrades must adhere to current building codes and regulations. These codes are in place to ensure safety, proper sanitation, and environmental responsibility. Before starting any significant plumbing work, it’s important to obtain the necessary permits and work with licensed professionals familiar with local regulations. Code-compliant upgrades not only protect the homeowner legally but also add value to the property in case of future resale.
Considering the Structural Implications
Retrofitting a plumbing system often involves working within walls, ceilings, and floors. This process may require the removal and replacement of drywall, flooring, and insulation. Careful planning helps minimize damage to the home’s structure and ensures that access panels are properly installed for future maintenance. In some cases, re-routing pipes through basements, attics, or crawl spaces can simplify installation while preserving finishes.
Budgeting and Financial Planning
Modernizing a plumbing system is a significant investment, and costs can vary widely based on the size of the home, the materials selected, and the labor involved. Developing a realistic budget is critical to avoid unexpected expenses. It’s also wise to build in a contingency fund for issues that may arise once work begins, such as hidden water damage or mold. Some homeowners explore financing options or home improvement loans to help spread out the cost of the upgrade.
Working with Experienced Professionals
Hiring the right plumbing contractor is essential to the success of any modernization project. Experienced plumbers can assess the condition of the existing system, recommend appropriate upgrades, and ensure high-quality workmanship. It’s important to review credentials, insurance coverage, and past customer feedback before hiring a contractor. A reputable professional will offer clear communication, accurate estimates, and a detailed timeline for completion.
Preserving Historical Aesthetics with Modern Efficiency
![]() For homeowners in older or historic homes, maintaining architectural integrity is often a priority. Fortunately, it’s possible to modernize plumbing without compromising historical features. Exposed copper piping, vintage-style fixtures, and traditional finishes can be paired with modern materials and technologies behind the scenes. With careful planning, homeowners can retain the charm of an older home while enjoying the reliability of a modern plumbing system.
For homeowners in older or historic homes, maintaining architectural integrity is often a priority. Fortunately, it’s possible to modernize plumbing without compromising historical features. Exposed copper piping, vintage-style fixtures, and traditional finishes can be paired with modern materials and technologies behind the scenes. With careful planning, homeowners can retain the charm of an older home while enjoying the reliability of a modern plumbing system.
Preparing for the Long-Term
Once a plumbing system has been modernized, ongoing maintenance is key to preserving its performance. Homeowners should schedule periodic inspections, flush water heaters, clean aerators, and remain vigilant for signs of wear. Creating a maintenance schedule and documenting all upgrades also helps future homeowners understand the system’s history and upkeep needs. A well-maintained modern plumbing system can provide decades of worry-free service.
Uncovering the Hidden Issues: Diagnosing Plumbing Valve Failures
Plumbing valves are the unsung heroes of any residential or commercial plumbing system. They regulate water flow, manage pressure, and allow isolation of sections for maintenance. However, when these valves begin to fail, the consequences can range from a minor inconvenience to major water damage and system breakdowns. Diagnosing plumbing valve failures early is essential to maintaining the integrity of your plumbing infrastructure and avoiding costly repairs or replacements. Understanding the signs, causes, and corrective steps is key to tackling valve issues effectively.
Recognizing the First Signs of Trouble
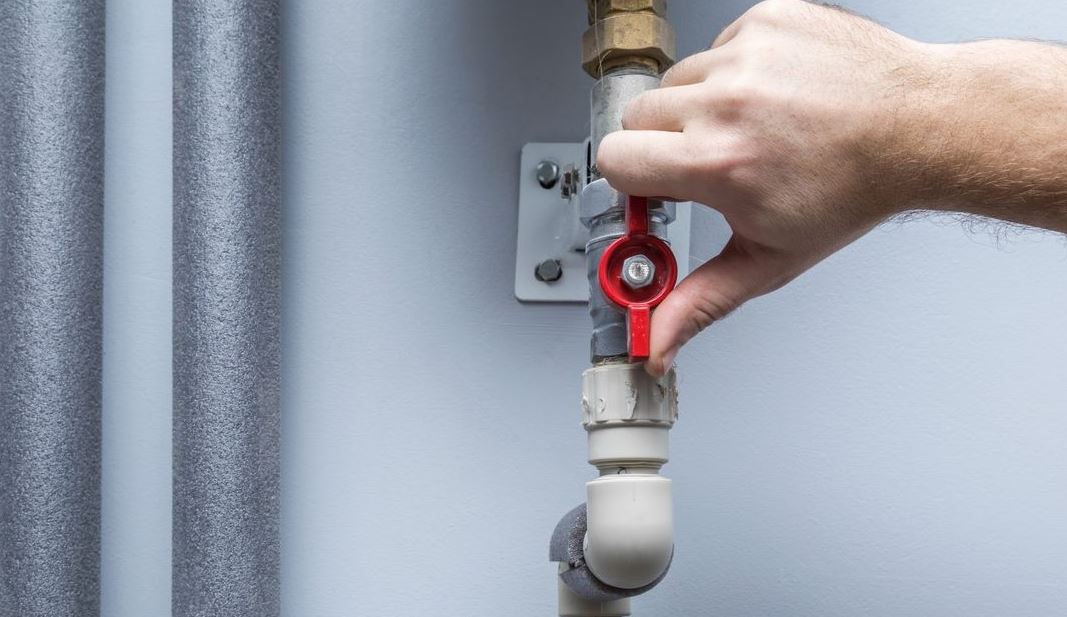 Most valve failures don’t happen overnight. They typically show signs of wear and malfunction before completely breaking down. Homeowners and property managers should remain alert to early warnings such as inconsistent water pressure, strange noises from the pipes, difficulty turning the valve handle, or visible leaks. Water discoloration or a sudden increase in utility bills may also indicate internal valve corrosion or leakage. Ignoring these signs often allows minor issues to escalate into more serious problems, such as water contamination or structural damage due to leaks.
Understanding Common Types of Valves and Their Failures
Each type of plumbing valve is prone to specific forms of failure. For example, gate valves often seize due to mineral buildup, while ball valves might suffer from worn-out seals. Globe valves can become clogged with debris over time, reducing water flow or failing to shut off properly. Check valves, which prevent backflow, may stop functioning due to stuck internal components. Recognizing the valve type in use helps narrow down potential failure causes and speeds up the diagnostic process.
Internal Corrosion and Material Fatigue
One of the most frequent causes of valve failure is internal corrosion. Metal valves exposed to water over long periods naturally degrade, especially if the water is acidic or contains high levels of minerals. Corrosion weakens the valve body and moving parts, resulting in leaks or complete mechanical failure. Material fatigue is another concern, especially in older plumbing systems where valves have undergone frequent use. Continuous thermal expansion and contraction also contribute to cracking or warping, compromising the valve’s ability to seal properly.
Sediment and Debris Blockages
Foreign matter in the water supply, such as rust, sand, or scale, can accumulate within valves over time. This buildup may clog the valve mechanism, making it difficult to open or close completely. Sediment is particularly problematic in globe and gate valves, which have multiple internal pathways. In some cases, blockages may cause the valve to remain stuck in a partially open or closed position, leading to inconsistent water delivery or increased pressure in adjacent pipes.
Seal and Gasket Deterioration
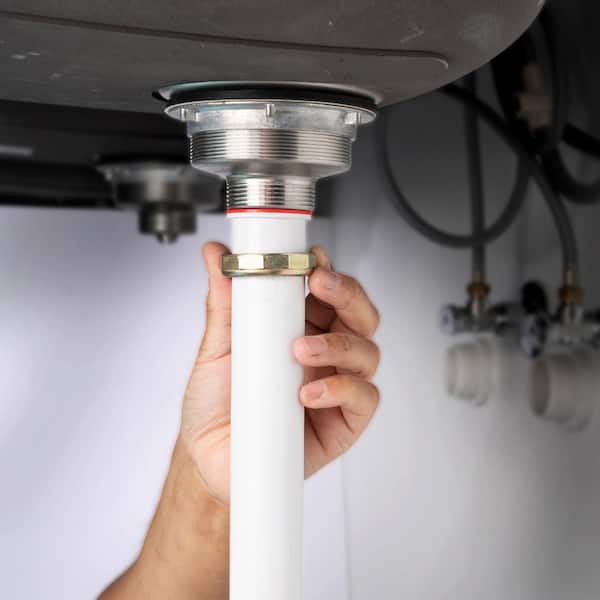 Seals and gaskets play a crucial role in ensuring valves maintain a watertight function. Over time, these rubber or synthetic components wear out due to exposure to heat, chemicals, and pressure fluctuations. As they degrade, leaks become more common, and the valve’s performance declines. Gasket failure is a common culprit behind slow drips near the valve stem or body, which can be mistakenly attributed to pipe leaks if not examined closely.
Improper Installation and Mechanical Stress
Valve failures are not always due to age or wear. Improper installation can lead to premature breakdowns. If valves are over-tightened, installed against manufacturer recommendations, or not supported properly, they can experience stress that leads to cracks or warping. Mechanical vibrations, especially in systems with high water velocity or pressure, can loosen fittings and damage valve integrity. Ensuring correct alignment and support during installation can significantly reduce these risks.
Temperature Extremes and Freezing Conditions
In colder climates, freezing temperatures pose a serious threat to plumbing valves. Water trapped inside a valve can freeze, expand, and crack the valve body. Even valves made from freeze-resistant materials can fail if not properly insulated or drained before winter. Extreme heat, on the other hand, may warp plastic valves or cause accelerated degradation of internal components. Monitoring and protecting valves exposed to environmental extremes is crucial to maintaining function.
Water Hammer and Pressure Surges
Water hammer, the loud banging noise that occurs when a valve closes too quickly, is more than just a nuisance. It reflects sudden changes in water pressure that can strain valve components. Repeated exposure to these pressure surges can cause valve seats to crack, handles to loosen, or seals to rupture. Installing water hammer arrestors and pressure regulators can help minimize this risk and extend valve life.
Evaluating Valve Handle Resistance
Difficulty in turning a valve handle is often a sign of internal issues. Stiffness may result from corrosion, sediment buildup, or a misaligned internal mechanism. Conversely, a handle that turns too easily or without resistance may indicate a broken stem or disconnected internal parts. Evaluating handle tension can offer a simple yet effective diagnostic clue, prompting further inspection if the resistance feels unusual.
Listening for Unusual Sounds
Audible cues often accompany failing valves. Whistling, rattling, or banging sounds from within the plumbing system may signal a partially closed valve, trapped air, or pressure imbalances caused by a faulty component. In the case of leaking check valves, a gurgling or backflow noise may be detected near fixtures. Listening carefully and tracing the sound to its source can help pinpoint which valve is at fault.
Using Visual Inspection Techniques
Routine visual inspections are one of the simplest and most effective ways to catch valve problems early. Looking for rust stains, moisture accumulation, white scale deposits, or cracks in the valve body provides clear warning signs. Inspecting joints and fittings around valves for water seepage or corrosion also helps identify hidden leaks. Transparent valve covers or removable panels in some modern systems make internal checks even easier.
Testing for Functionality and Isolation
To determine whether a valve is functioning properly, performing a manual test is essential. Turning the valve on and off should produce an immediate change in water flow. If the flow continues unchanged, the valve may be stuck, internally broken, or bypassed due to system modifications. Isolating sections of the system and testing water output in each area can help narrow down the failing component.
Utilizing Pressure Gauges and Diagnostic Tools
When visible signs are not enough, pressure testing can be highly revealing. Using pressure gauges before and after a valve can identify drops or spikes that point to internal leakage or blockage. Specialized diagnostic tools, such as ultrasonic leak detectors or infrared thermal cameras, can locate temperature anomalies or sound patterns associated with failing valves. These advanced methods are particularly useful in commercial or complex residential systems.
Addressing Partial or Intermittent Failures
Valves don’t always fail completely. In many cases, they exhibit intermittent performance issues such as shutting off slowly, dripping sporadically, or refusing to maintain a closed position. These issues may stem from internal misalignment, fluctuating water quality, or gradual component degradation. While these failures are less dramatic, they should not be ignored, as they often precede full malfunction and water damage.
Repair or Replace: Making the Right Decision
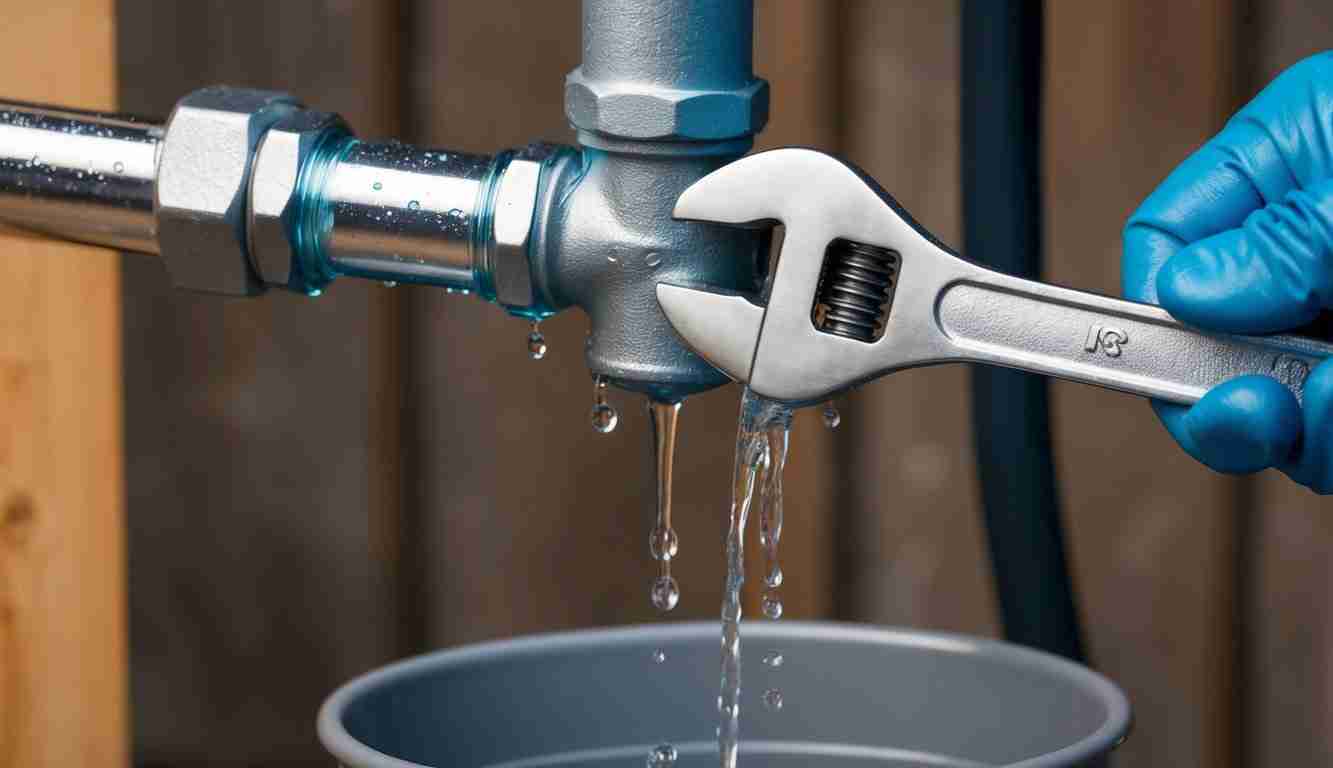 After diagnosing the problem, choosing whether to repair or replace the valve depends on several factors. If the valve is relatively new and the issue is limited to replaceable parts like seals or washers, repair may be cost-effective. However, older valves with widespread corrosion or structural issues are better replaced entirely. It’s also important to consider accessibility—if a valve is in a difficult-to-reach area, replacement may save time and labor in the long run.
Preventive Maintenance Strategies
Preventing valve failures starts with regular inspection and system maintenance. Flushing plumbing systems periodically can help reduce sediment buildup. Applying lubricants to valve stems and rotating infrequently used valves prevents them from seizing. Checking water chemistry and installing filters or softeners when needed can protect internal valve components from corrosive damage. Implementing a preventative approach greatly extends valve life and improves overall plumbing reliability.
Consulting Professional Plumbers for Complex Systems
While many valve diagnostics can be performed by homeowners, complex plumbing systems often require the insight of a professional plumber. Commercial properties, multi-unit residences, and older homes with outdated infrastructure benefit from expert evaluation. Professionals can identify issues not obvious to the untrained eye and use advanced equipment to test system performance, ensuring a thorough and accurate diagnosis.
Why Local Plumbing Services Are the Smartest Choice for Your Home
When plumbing problems arise, your first instinct might be to search online for quick solutions or large national companies promising fast service. While these providers often have a widespread presence, there’s a compelling case to be made for going local. Choosing a local plumbing service offers several distinct advantages that national chains simply cannot match. From faster response times to a better understanding of your area’s infrastructure, local plumbers are often the unsung heroes who keep homes running smoothly.
Faster Response in Times of Emergency
One of the most stressful aspects of a plumbing issue is the urgency it often requires. Whether it’s a burst pipe or a blocked drain, quick action can prevent extensive damage. Local plumbing services are typically situated just a few miles away, meaning they can reach your home much faster than companies based farther out. Because they operate within a specific region, they can prioritize your emergency more efficiently, reducing the time it takes to address critical problems. Their proximity ensures that help is not only a phone call away, but physically closer as well.
Familiarity with Local Codes and Infrastructure
Each region has its own plumbing regulations and building codes. Local plumbers are usually well-versed in these requirements because they work with them on a daily basis. They understand the intricacies of local water systems, soil types, and even climate-related challenges that can affect plumbing. This specialized knowledge allows them to perform installations and repairs that comply fully with legal standards, reducing the risk of fines or failed inspections. National companies may rely on generic approaches that overlook these regional details, which could lead to long-term complications.
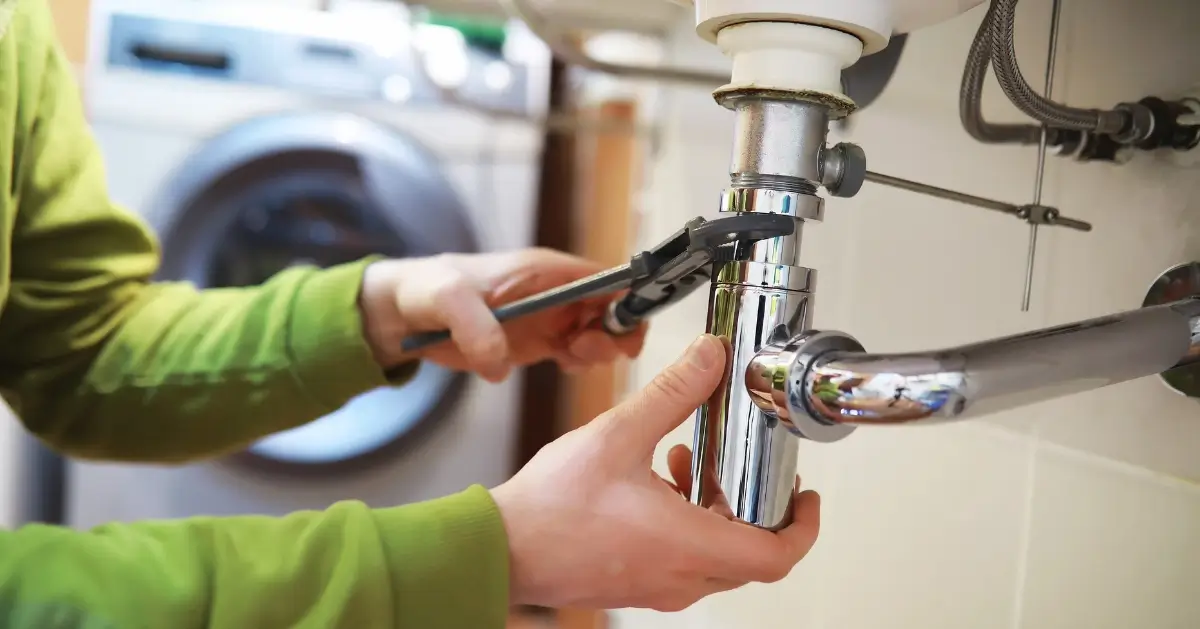
Personalized Customer Service That Builds Trust
Unlike larger companies that may rotate staff or outsource work, local plumbing businesses thrive on repeat customers and word-of-mouth referrals. This community-focused approach translates to a more personal customer experience. The same technician might visit your home multiple times, gradually becoming familiar with your plumbing system and preferences. This relationship fosters trust and consistency in service quality. With a local plumber, you’re more than just another job ticket—you’re a valued client whose satisfaction directly affects their reputation.
Cost Transparency and Competitive Pricing
Local plumbing services often offer more transparent pricing structures than national chains. With fewer overhead costs such as expensive advertising campaigns or corporate offices, local businesses can pass savings on to the customer. They are more likely to provide straightforward quotes and avoid unnecessary upselling. Furthermore, being part of the same community means they are invested in offering fair and honest service. Their long-term success depends on maintaining a reputation for affordability and integrity.
Supporting Your Local Economy
Hiring a local plumber contributes directly to your community’s economy. The money spent on services tends to stay within the region, helping other small businesses and creating jobs. This cycle of local economic growth fosters a more resilient and interconnected neighborhood. In contrast, hiring a national brand often means your money gets funneled into centralized corporate accounts, far removed from the community you live in. By choosing local, you’re investing in the health and prosperity of your own area.
Easier Scheduling and Flexible Availability
Scheduling service with a local plumber is usually a more straightforward process. Because they typically handle a smaller volume of clients compared to national providers, local plumbers can be more flexible with appointments. They may offer same-day services or work outside of conventional business hours, including weekends and holidays. Their flexible availability is especially helpful during unforeseen plumbing emergencies when waiting several days just isn’t an option.
Stronger Commitment to Quality and Reputation
Local plumbers are deeply invested in the satisfaction of every client they serve. In smaller communities, word travels fast, and a poor job can have a lasting negative impact on business. That’s why local plumbing professionals often go above and beyond to ensure every job is completed to a high standard. Their commitment to quality is not just professional—it’s personal. Their success hinges on community feedback and loyalty, so they’re highly motivated to get things right the first time.
Environmental Responsibility and Sustainable Practices
Local plumbing services often have a better understanding of the environmental issues affecting your region. Whether it’s drought conditions, water restrictions, or aging infrastructure, local professionals are more likely to recommend sustainable solutions tailored to your specific environment. They may also have relationships with local suppliers who provide eco-friendly products. This regional awareness supports more responsible water use and promotes greener home maintenance.
Direct Communication Without the Middleman
Working with a local plumber often eliminates the hassle of going through call centers or automated systems. You’re more likely to speak directly with the technician or business owner, ensuring your concerns are heard clearly and responded to quickly. This direct communication not only speeds up the process but also helps avoid misunderstandings. It also allows the plumber to ask relevant questions and give you accurate advice before they even arrive on-site.
Local Knowledge Equals Better Problem Solving
Plumbing issues can vary widely based on where you live. Older neighborhoods may have outdated pipes, while newer developments might deal with modern system glitches. Local plumbers are familiar with these nuances. Their experience in your area gives them a unique perspective that enables faster diagnosis and more effective repairs. They are also more aware of recurring local issues such as hard water, poor drainage areas, or seasonal flooding patterns, allowing them to offer solutions that are both preventative and durable.
Community-Focused Ethics and Accountability
Because local plumbers operate within the same neighborhoods where they live, shop, and send their kids to school, there’s a heightened level of accountability in their work. They aren’t just serving customers—they’re serving neighbors. This connection to the community often translates into a higher standard of ethics and a greater sense of pride in their workmanship. Mistakes are less likely to be ignored or swept under the rug when the business owner could run into you at the grocery store.
Reliability Through Long-Term Relationships
When you build a relationship with a local plumber, you gain a reliable resource for future needs. You don’t have to explain your home’s layout or history each time you make a call. A local professional who knows your property can offer tailored maintenance advice and alert you to potential issues before they escalate. Over time, this continuity of care can save you money and reduce the likelihood of surprise breakdowns. With a national chain, the chances of getting the same technician twice are slim.
Enhanced Security and Peace of Mind
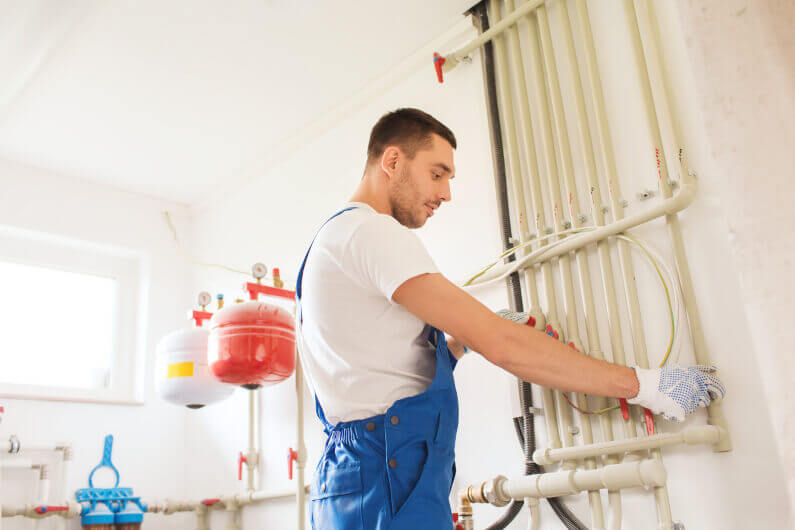 Allowing someone into your home for repairs requires a great deal of trust. Local plumbers are often known in the community and may even come recommended by friends or neighbors. Their local ties make it easier to verify credentials and check reviews from people you actually know. This familiarity offers an added layer of security and comfort, especially when compared to large companies that may send different, unfamiliar technicians each time.
Timely Maintenance for Seasonal Challenges
Every region faces its own seasonal plumbing challenges—frozen pipes in winter, heavy rainfall in spring, or droughts in summer. Local plumbing professionals understand how these conditions affect your system and can offer proactive maintenance to prepare for each season. Their seasonal awareness allows them to make timely recommendations, such as insulating pipes before winter or cleaning gutters before monsoon. This kind of preparedness helps prevent costly emergencies down the road.
Access to Specialized Local Services
Many local plumbers offer unique services tailored to the needs of their community. Whether it’s rainwater harvesting systems, sump pump installations for flood-prone areas, or water softeners for mineral-heavy water, these customized offerings often reflect the realities of your local environment. National companies may not offer such targeted solutions, as they tend to standardize their services across regions. Local professionals, on the other hand, are constantly adapting to the demands of their specific service area.
How Poor Plumbing Damages the Environment
Plumbing is often seen as a functional necessity, quietly operating behind walls and beneath floors to deliver clean water and remove waste. However, the hidden nature of plumbing can cause people to overlook its broader implications, particularly the environmental consequences of neglect or improper practices. Poor plumbing doesn’t just lead to leaky faucets or high water bills—it can be a silent but significant contributor to environmental degradation. From water wastage and pollution to energy inefficiency and habitat destruction, the environmental impact of poor plumbing practices stretches far beyond what many homeowners and property managers realize.
Unchecked Water Waste and Its Ripple Effect
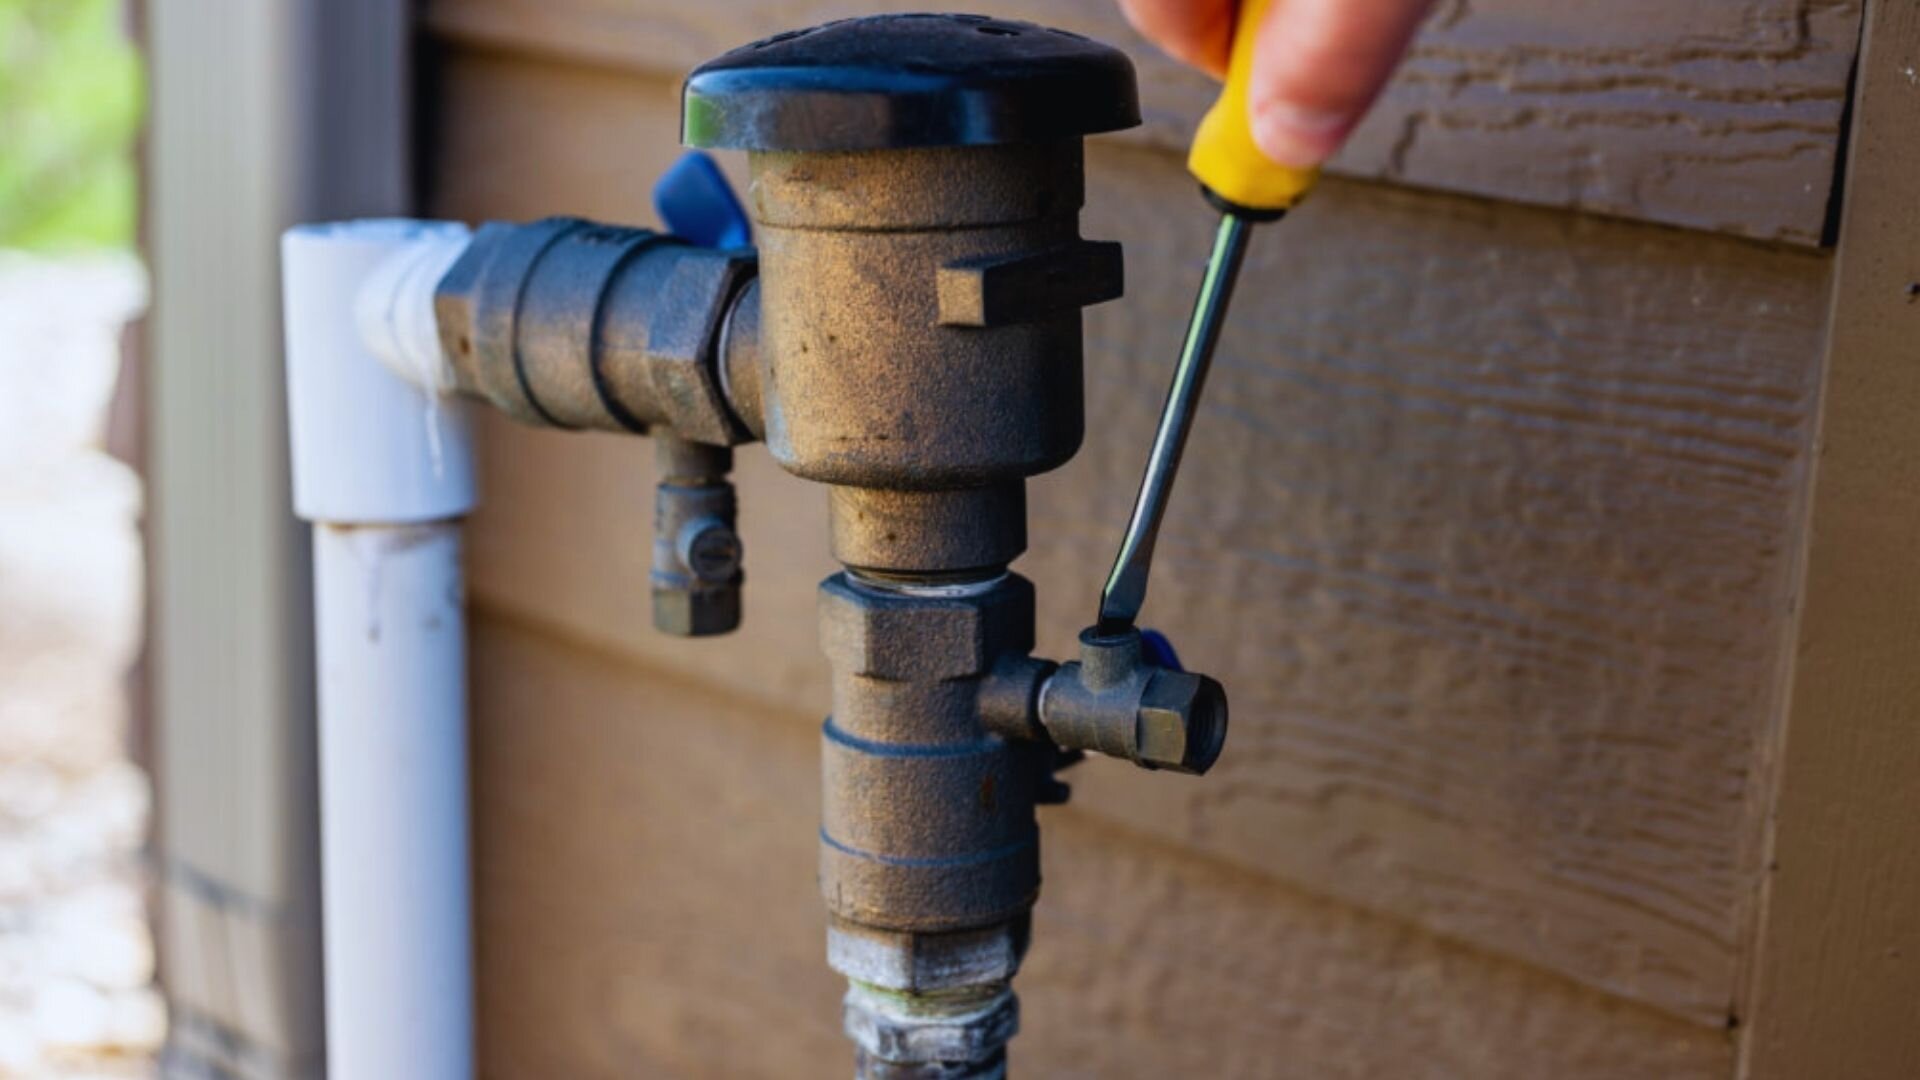 One of the most immediate and visible consequences of poor plumbing is excessive water waste. Dripping taps, leaking pipes, and malfunctioning toilets may appear minor on their own, but over time, these small inefficiencies accumulate into thousands of gallons of wasted water. In areas experiencing drought or limited freshwater supplies, this misuse can be particularly damaging.
Water is not a limitless resource. It undergoes extensive processing, including extraction, treatment, and distribution. Every drop lost through leaks requires energy and resources to replenish. Additionally, leaky systems reduce the efficiency of municipal water networks, straining already burdened infrastructure and compounding the problem at a systemic level. In commercial or industrial settings, these inefficiencies multiply, leading to an even greater environmental footprint.
Contaminating Natural Water Sources
Poor plumbing doesn’t just waste clean water—it can also contribute to the contamination of natural water bodies. Improperly connected or corroded pipes can cause raw sewage or greywater to seep into rivers, lakes, and groundwater. This leakage introduces harmful pathogens, chemicals, and nutrients that can wreak havoc on aquatic ecosystems.
For instance, when wastewater enters a water body untreated, it fuels the growth of algae, leading to algal blooms that deplete oxygen and kill marine life. This phenomenon, known as eutrophication, can turn once-thriving habitats into lifeless zones. Contaminated groundwater also poses risks to human health, especially in rural or underserved communities that rely on wells or local water sources. These consequences are not limited to rural areas—urban zones with aging infrastructure are equally vulnerable to similar risks if routine plumbing maintenance is ignored.
Energy Consumption and Plumbing Efficiency
Another often-overlooked impact of faulty plumbing is energy inefficiency. Water heaters, boilers, and pumps all rely on energy to function, and leaks or clogs can force these systems to work harder than necessary. When hot water lines leak, for example, more energy is required to continuously reheat water to maintain temperature levels, significantly increasing carbon emissions.
Similarly, poorly insulated pipes can lose heat rapidly, demanding additional energy input to maintain desired temperatures. In commercial buildings, such losses can be substantial. By addressing issues like inefficient water heaters, pipe insulation, and high-flow fixtures, property owners can reduce energy usage and minimize their carbon footprint. Neglecting such upgrades or repairs, however, leads to ongoing environmental strain.
Chemical Pollution from Plumbing Repairs and Maintenance
Plumbing repairs and maintenance often involve the use of chemical agents, such as drain cleaners, pipe sealants, and anti-corrosive treatments. When used irresponsibly or in excess, these chemicals can escape into the environment through wastewater systems or accidental spills. Many of these substances are toxic to aquatic life and can contaminate soil and groundwater, creating long-term ecological damage.
Additionally, older buildings may still use lead or other hazardous materials in their plumbing systems. If these components degrade, they can release harmful substances into water supplies. Removing and replacing outdated materials is crucial, but doing so without proper disposal protocols can shift the environmental burden elsewhere. Sustainable plumbing practices require not only the use of environmentally friendly products but also careful attention to waste handling and disposal.
Infrastructure Decay and Resource Depletion
In many cities, aging plumbing infrastructure has become a significant concern. Decades-old systems often experience corrosion, buildup, and structural degradation that contribute to leaks, bursts, and contamination. Replacing such infrastructure is resource-intensive, involving the use of metals, plastics, fuel, and manpower.
When plumbing maintenance is delayed or ignored, it accelerates the rate at which materials and energy must be expended for emergency repairs or full system overhauls. This cycle of decay and replacement increases environmental pressure through repeated manufacturing, transportation, and construction efforts. A more sustainable approach involves proactive inspection and gradual upgrades, extending the lifespan of plumbing systems and minimizing ecological impact.
Impact on Soil Health and Vegetation
Leaking sewage and greywater systems can have direct effects on soil health. When nutrients and contaminants accumulate in the ground, they alter its chemical composition, making it less suitable for native plant species. Excessive moisture from plumbing leaks can also lead to root rot, fungus growth, and other disruptions to local vegetation.
In residential areas, improper drainage or pipe leaks can drown lawns, gardens, and green spaces, affecting landscaping efforts and ecosystem services such as pollination and erosion control. Over time, these effects can lead to a loss of biodiversity and ecological resilience, further emphasizing the importance of sound plumbing practices in preserving local environments.
Stormwater Mismanagement and Flooding
Another critical area where plumbing plays an environmental role is stormwater management. Homes and buildings are often equipped with drainage systems that channel rainwater away from structures. However, when these systems are clogged, broken, or poorly designed, stormwater can accumulate, leading to localized flooding.
Flooded streets and basements are more than just an inconvenience—they pose serious risks to public health and the environment. Floodwaters often mix with sewage and chemical runoff, transporting pollutants to nearby water bodies. Moreover, erosion caused by poor drainage can damage soil stability and compromise building foundations, triggering a cycle of repair and environmental degradation.
Microplastic and Debris Discharge
With the growing use of plastic plumbing fixtures and components, there’s an emerging concern about microplastics entering the water system. Over time, plastic pipes and fittings may degrade, releasing tiny particles into wastewater streams. These microplastics are difficult to filter and often end up in rivers and oceans, where they become part of the food chain.
Poorly maintained traps and filters in sinks, showers, and industrial plumbing systems can also fail to capture solid debris, further polluting wastewater. Washing synthetic fabrics or using personal care products with microbeads adds to this problem. Though not all of these issues originate with plumbing, the design and upkeep of plumbing systems can either mitigate or exacerbate them.
Economic Cost Translated into Environmental Burden
The financial costs of inefficient plumbing are well documented, but the environmental costs are often underappreciated. Every dollar spent on unnecessary water heating, every material wasted in emergency pipe replacement, and every resource allocated to managing pollution is a dollar—and an environmental cost—that could have been saved through better planning and maintenance.
Sustainable plumbing practices not only protect the environment but also offer long-term cost savings. Investing in efficient fixtures, regular inspections, and green technologies helps reduce both utility bills and the ecological footprint. Unfortunately, many property owners delay plumbing improvements due to upfront costs, inadvertently passing the burden onto the environment.
The Role of Public Awareness and Regulation
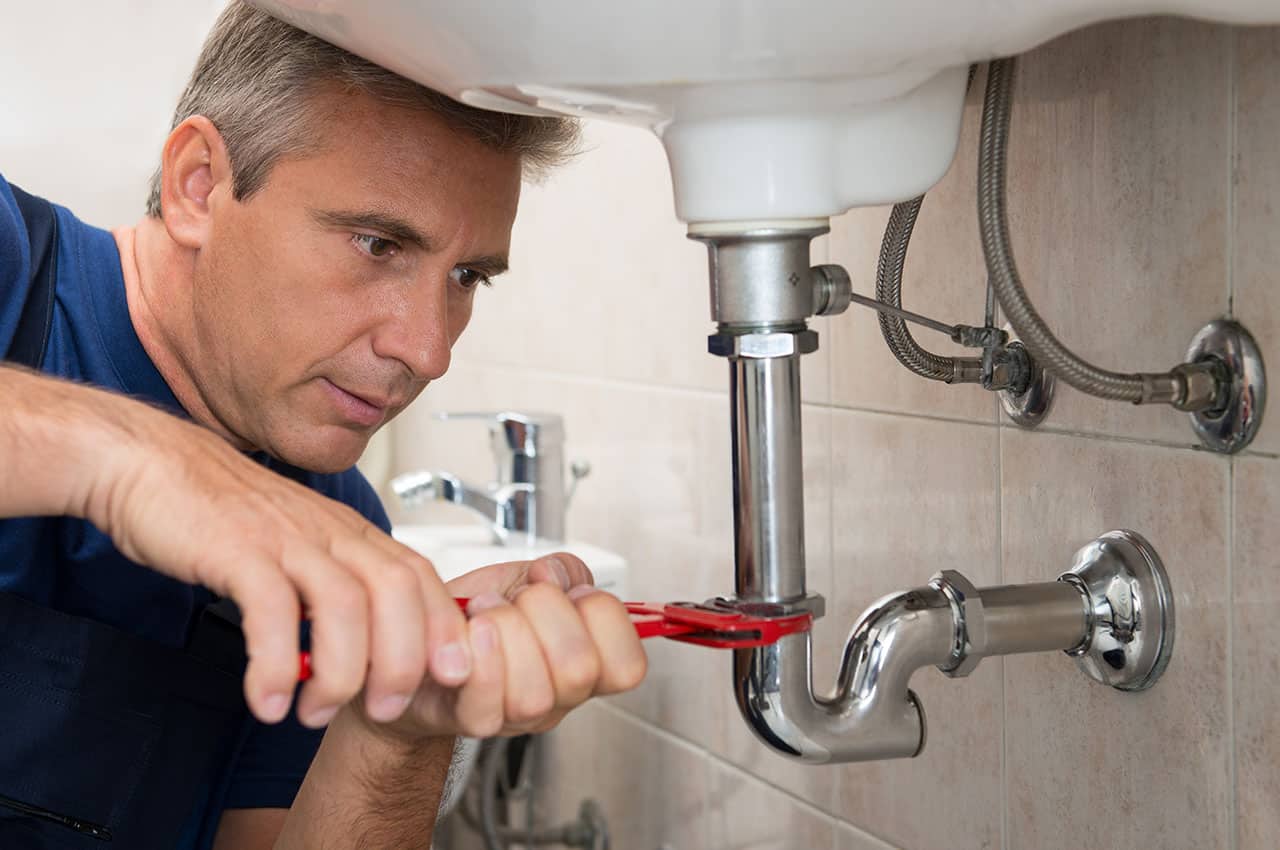 Reducing the environmental impact of plumbing systems requires a combination of individual responsibility and broader regulatory frameworks. Building codes, environmental regulations, and water conservation guidelines can guide best practices, but compliance depends heavily on awareness and enforcement.
Homeowners, contractors, and businesses alike must be educated on the importance of plumbing maintenance and sustainable material choices. Training programs, incentives for eco-friendly upgrades, and public outreach campaigns can help shift industry norms and consumer expectations. When sustainability becomes part of standard plumbing practice, the environmental benefits follow naturally.
Future Innovations and Greener Alternatives
Fortunately, the plumbing industry is evolving to meet environmental demands. Innovations such as greywater recycling systems, smart leak detectors, and water-efficient fixtures are becoming more accessible. These technologies allow for better monitoring, reduced consumption, and quicker response to potential problems.
The use of sustainable materials like PEX piping, rainwater harvesting systems, and eco-friendly sealants also helps reduce environmental impact. As green building standards become more prevalent, the plumbing sector will play a crucial role in promoting ecological responsibility. Widespread adoption of these innovations will depend on a collective shift in mindset—one that values long-term sustainability over short-term convenience.
Protect Your Pipes: A Practical Guide to Winterizing Plumbing
As temperatures begin to plummet and winter settles in, it’s time to turn your attention to protecting one of the most vulnerable systems in your home—your plumbing. Frozen pipes, cracked fittings, and water damage can all be disastrous consequences of not preparing properly. Fortunately, winterizing your home’s plumbing doesn’t have to be complicated. With a thoughtful approach and some preventative care, you can safeguard your water system and enjoy peace of mind throughout the coldest months.
Understanding Why Winterizing Matters
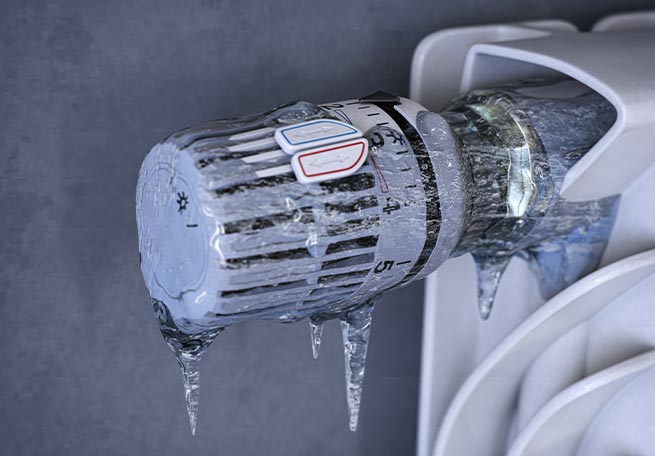 When water inside your pipes freezes, it expands. This expansion creates significant pressure inside the pipe, which can lead to cracks or even full bursts. The damage may not be visible right away, but once the ice melts, it can unleash gallons of water into your walls, ceilings, or basement. The cost of repairs, not to mention the disruption to your daily routine, is enough to make any homeowner cringe. By winterizing, you’re taking proactive steps to prevent these risks before they arise.
Starting with the Exterior of Your Home
Begin your winterization journey by walking around the outside of your house. Exterior plumbing components are typically the most exposed and vulnerable to freezing. Disconnect all garden hoses and drain them completely before storing them away. Leaving a hose attached can trap water in the faucet or hose bib, increasing the chance of freezing. If your home has outdoor faucets, shut off their water supply from inside the house if possible and let the faucet drain fully. For extra protection, consider installing an insulated faucet cover.
If your property includes irrigation or sprinkler systems, these should also be addressed. Most systems come with a way to drain out any remaining water, either manually or using compressed air. Neglecting this step can result in burst underground lines, leading to costly and labor-intensive repairs come springtime.
Paying Attention to Crawl Spaces and Basements
Many homes have plumbing that runs through unheated areas such as basements, crawl spaces, attics, or garages. These zones are often out of sight and can be forgotten until it’s too late. Take time to inspect any visible piping and determine how well it’s insulated. Foam pipe sleeves or heat tape can offer a simple and cost-effective solution to keep these pipes from freezing.
If there are any drafts or open vents in these spaces, seal them to maintain warmth. A small amount of warm air circulation goes a long way in preventing freezing. For particularly cold regions, consider installing a space heater or heat lamp that activates during extreme cold spells. Safety precautions should be a priority when using such devices.
Draining and Flushing Unused Water Lines
Homes with seasonal plumbing—like those in vacation properties or guesthouses—require extra attention. If you’re not planning to use these spaces during the winter, it’s best to shut off the main water valve leading into them. Once turned off, open all faucets and fixtures to allow the water to fully drain out. Flushing toilets and emptying water heaters or tanks in these areas is also advisable.
Any appliances that use water, such as washing machines, dishwashers, or icemakers, should have their supply lines disconnected and drained. For added protection, pour a small amount of antifreeze into toilet bowls, sink traps, and floor drains to prevent water in the traps from freezing.
Insulating the Right Way Indoors
Insulation isn’t just for your attic and walls—it plays a key role in protecting your plumbing too. Start by insulating any exposed pipes inside your home, especially those that run along exterior walls or under sinks. Foam pipe wrap is easy to install and provides an effective barrier against cold air.
You can also open cabinet doors in kitchens and bathrooms to allow warm indoor air to reach hidden pipes. This simple trick can make a surprising difference, particularly on frigid nights. If you’re away for an extended period, keep your thermostat set to at least 55°F to prevent interior pipes from freezing.
Watching for Warning Signs of Freezing
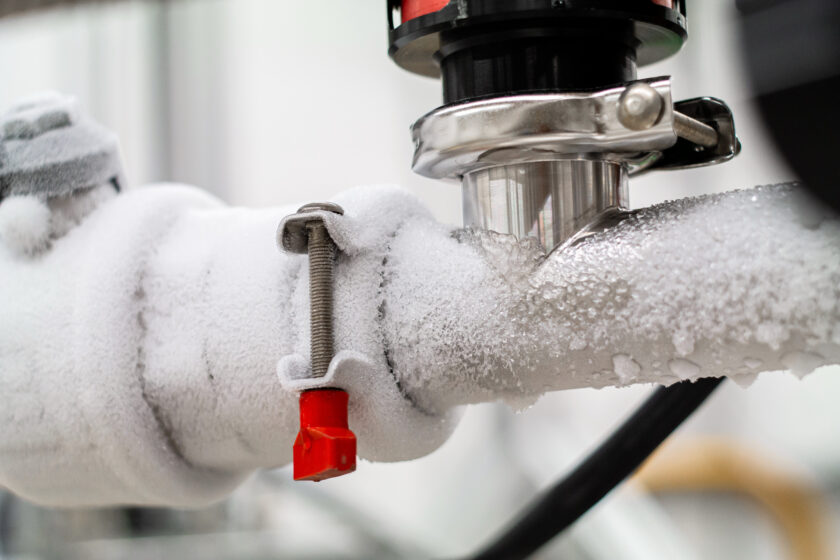 Even with precautions in place, it’s helpful to know what signs to watch for. If you turn on a faucet and only a trickle comes out—or no water at all—this may indicate a frozen pipe. A bulging or frosty appearance on a visible section of pipe is another red flag. In these cases, time is of the essence. Shut off the water supply immediately and begin warming the pipe gradually using a hairdryer, space heater, or warm towels.
Avoid using open flames, propane torches, or high heat, as this can damage the pipe and increase the risk of fire. If you’re unable to locate the freeze or safely thaw the pipe, it’s best to call in a professional plumber.
Preparing Water Heaters and Backup Systems
Winterizing isn’t only about pipes—it includes your water heater too. Sediment can build up inside your tank, reducing efficiency and potentially leading to damage in cold temperatures. Draining a few gallons from the tank can help reduce this risk and prolong the unit’s lifespan.
Consider insulating your water heater with a specially designed blanket to reduce heat loss. This is especially beneficial if the heater is located in an unheated area. You may also want to install a backup battery or generator for your sump pump if you live in an area prone to power outages during snowstorms. Without power, the sump pump can’t operate, which could result in flooding during winter thaws.
Safeguarding Plumbing During Vacation or Extended Absence
If you’re planning to leave home for an extended period during the winter, take extra steps to avoid a plumbing disaster while you’re away. Shut off the water supply completely and drain the system if you’re comfortable doing so. Alternatively, invest in smart technology such as leak detection sensors or remote water shut-off valves. These systems can alert you via your phone if a pipe begins to freeze or leak, providing critical time to respond.
Ask a neighbor or friend to periodically check your home during severe weather. A quick visual inspection could help detect a problem early and prevent significant damage.
Why Professional Inspections Make a Difference
While many winterization tasks are simple enough for homeowners to handle, a professional plumbing inspection can add an extra layer of assurance. Licensed plumbers can identify hidden vulnerabilities, check for minor leaks, and suggest long-term improvements. They may also provide services like blow-out drain flushing or pipe insulation upgrades that can be difficult to do on your own.
An annual check-up ahead of winter can help you stay ahead of the weather and avoid costly surprises. It’s a small investment that can deliver major peace of mind.
Thinking Beyond the Pipes
Winterizing your plumbing is just one part of broader seasonal home preparation. It’s a good opportunity to review your emergency supplies, test smoke and carbon monoxide detectors, and check that your home is sealed against drafts. All of these steps contribute to a safer, more comfortable winter.
Proper planning and consistent maintenance go a long way toward ensuring your home remains warm and dry throughout the cold season. Not only does it save money on repairs and water damage restoration, but it also helps maintain the value and integrity of your home over the years.
How to Install a New Showerhead: A Plumbing Guide
Changing a showerhead is one of the easiest yet most effective ways to enhance your bathroom experience. Whether you’re upgrading for aesthetics, improved water flow, or eco-friendliness, installing a new showerhead doesn’t require a professional plumber. With just a few tools and a bit of time, you can have a fresh, fully functioning showerhead in place. This guide explores everything you need to know about how to install a new showerhead, from selecting the right model to ensuring a leak-free finish.
Choosing the Right Showerhead for Your Needs
Before installation begins, it’s important to select a showerhead that meets your specific preferences. There are many types available, ranging from fixed models and handheld units to rain showers and multi-function designs. Consider whether you want a high-pressure spray for a refreshing blast or a gentle stream for relaxation. Look for models that offer water-saving features if conservation is a priority.
Material and finish also play a role. Chrome, brushed nickel, and oil-rubbed bronze are common finishes that can match your existing fixtures. Make sure the showerhead you choose is compatible with your current plumbing setup to avoid unnecessary modifications.
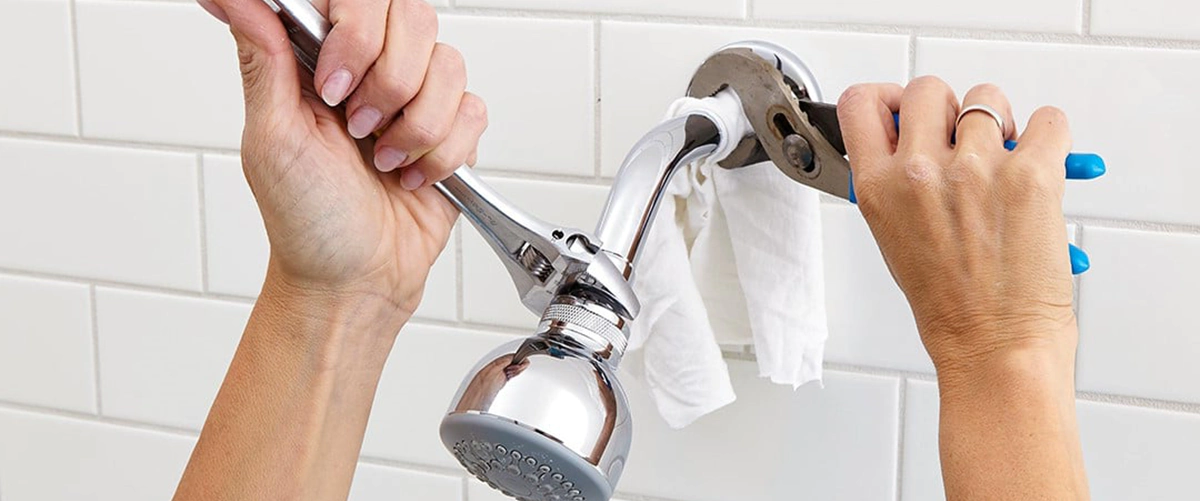
Gathering the Necessary Tools and Supplies
Installing a showerhead doesn’t require a wide array of tools. The basics include an adjustable wrench or pliers, plumber’s tape (also known as Teflon tape), and a cloth or rag to protect the finish of the fixture. In some cases, you may also need a step stool or ladder if the fixture is mounted high.
Make sure the water supply to the shower is turned off before starting any work. Although you won’t be accessing the main water line, it’s best to prevent unexpected sprays or drips by ensuring the shower valve is off.
Removing the Old Showerhead Safely
To begin the process, remove the existing showerhead by gripping the base with a wrench or pliers. Wrap a cloth around the shower arm to protect the finish if necessary. Turn counterclockwise to loosen and detach it. Some older showerheads might be corroded or tightly fixed due to mineral buildup, so applying a bit of penetrating oil and waiting a few minutes can make removal easier.
Once removed, inspect the shower arm for any remaining plumber’s tape, debris, or corrosion. Clean the threads thoroughly using a dry cloth or small wire brush. This ensures a secure connection for the new showerhead and helps prevent leaks.
Preparing the Shower Arm for Installation
After cleaning, wrap fresh plumber’s tape around the threads of the shower arm. This creates a watertight seal and makes it easier to screw on the new fixture. Wrap the tape clockwise to match the direction the showerhead will be turned when attached. Two to three full wraps are usually sufficient.
Avoid over-wrapping, as this can make the threads too bulky, potentially causing cross-threading or a poor fit. Make sure the tape is applied smoothly and tightly, without gaps or folds.
Attaching the New Showerhead Correctly
With the threads wrapped, screw the new showerhead onto the shower arm by hand. Start gently to avoid misalignment. Once the threads catch and the fixture feels snug, tighten further with an adjustable wrench if needed. Protect the finish of the new showerhead by placing a cloth between it and the tool.
Do not overtighten, as this can strip the threads or damage the fitting. Tighten just enough to ensure the connection is firm and secure. Many showerheads come with built-in washers or seals, so adding additional sealing material may not be necessary.
Testing the Installation for Leaks
Once the showerhead is attached, turn on the water supply and test the fixture. Let the water run for a minute and observe the connection point closely. If you notice any drips or moisture around the joint, turn off the water and tighten the showerhead slightly more.
In cases where tightening doesn’t stop the leak, remove the fixture, reapply fresh plumber’s tape, and try again. Persistent leaks may indicate a damaged shower arm or incompatible threading, in which case further inspection may be needed.
Installing a Handheld Showerhead Variant
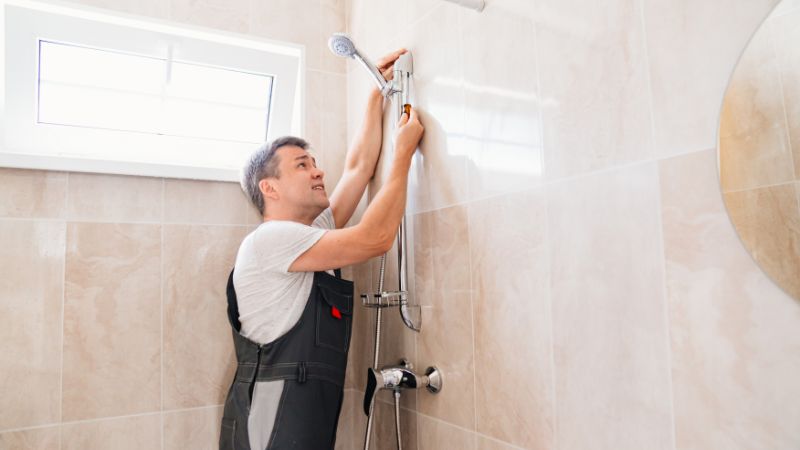 For those opting for a handheld model, the process includes an additional step of attaching a mounting bracket or diverter. These parts usually come with the unit and are installed between the shower arm and the hose.
After mounting the bracket, connect the hose to the bracket and the handheld head to the other end. Hand-tighten all connections and apply plumber’s tape as needed. Many handheld models also include suction cups or wall mounts for added convenience.
Once assembled, test both the fixed mount and the handheld wand for water flow and leaks. Make sure the hose hangs naturally and doesn’t create tension or interfere with movement.
Considering Water Pressure and Flow Restrictions
Modern showerheads often include flow restrictors to limit water usage and promote efficiency. While this is beneficial for conservation, it can sometimes result in low pressure, especially in homes with already limited water flow.
Some users choose to remove the flow restrictor for a stronger spray, although this can impact water bills and may violate local plumbing codes. If better pressure is important, look for models that are specifically designed to perform well under low-pressure conditions.
Maintaining the New Showerhead Over Time
Once installed, proper maintenance can extend the life of your showerhead and keep it performing well. Mineral deposits from hard water can clog nozzles over time, reducing flow and efficiency. Regularly soaking the head in a vinegar solution or using a commercial descaler helps keep it clean and functional.
Inspecting the connection occasionally ensures the seal remains intact. Replacing plumber’s tape and retightening the head annually can prevent leaks and maintain optimal performance.
For handheld units, check the hose for kinks or wear and replace it if flexibility decreases. A poorly functioning hose can reduce mobility and cause strain on the mounting bracket.
Upgrading Additional Shower Components
While changing the showerhead is a quick win, you may also consider upgrading other fixtures like the shower arm, flange, or diverter valve at the same time. These changes can modernize your bathroom’s look and improve functionality.
Shower arms come in different lengths and angles, allowing for a more personalized experience. Some models curve upward to accommodate rain showerheads, offering a more luxurious experience without requiring ceiling mounting.
Flanges cover the hole where the shower arm enters the wall and can be replaced for aesthetic purposes. Newer models can help provide a cleaner, more finished look.
Safety Considerations and Common Mistakes
When working with plumbing fixtures, safety and precision are key. Always use tools carefully to avoid damaging surrounding tiles or fixtures. Never use excessive force during removal or installation, as this can cause leaks or cracks in pipes hidden behind walls.
Avoid skipping steps like cleaning the threads or using plumber’s tape. These small measures make a significant difference in ensuring the longevity of your installation. If your showerhead doesn’t fit properly or feels loose, double-check the model specifications and threading compatibility.
For households with unusually high water pressure, installing a pressure regulator can help protect your fixtures from wear and tear. On the other hand, if your pressure is too low, you may want to consult a professional to explore options for boosting it effectively.
When to Call a Professional Plumber
Most showerhead installations are DIY-friendly, but certain circumstances may require professional help. If the shower arm is leaking inside the wall or shows signs of damage, or if you’re upgrading to a ceiling-mounted rain shower, it’s best to call in a plumber.
Similarly, if you’re combining your installation with a complete bathroom remodel or if you encounter unusual water pressure issues, professional guidance ensures the work meets safety standards and building codes.
A Simple Upgrade with Lasting Benefits
Installing a new showerhead is a straightforward project that can dramatically improve your daily routine. With the right tools, a little patience, and some basic knowledge, anyone can complete this home upgrade with confidence. A properly installed showerhead provides years of reliable service, enhances your bathing experience, and even saves water when chosen wisely.
Why Copper Pipes Are Still the Gold Standard in Plumbing
Copper plumbing pipes have long been regarded as a superior choice in the world of plumbing, prized for their durability, safety, and reliability. Even with the rise of modern alternatives like PEX and PVC, copper continues to be a staple in residential and commercial plumbing systems. This material has stood the test of time and, despite higher initial costs, it offers a range of benefits that make it a wise investment for both new construction and retrofit projects. Understanding the advantages of copper pipes can help homeowners, contractors, and property managers make more informed decisions about their plumbing systems.
Resilience That Withstands the Elements
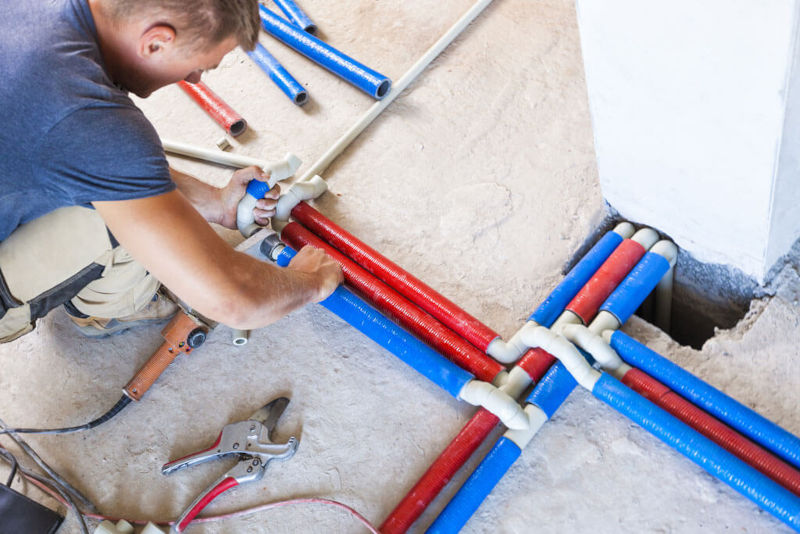 Copper’s natural strength plays a major role in its widespread use. Unlike plastic piping materials, copper doesn’t degrade under ultraviolet light, which makes it suitable for outdoor use or for areas exposed to sunlight. It can also handle extreme heat and cold more effectively, resisting damage in freezing temperatures where other materials might crack or burst. This thermal resilience is a major advantage, especially in climates where seasonal changes are intense and unpredictable.
Its rigid structure also means copper pipes are more impact-resistant, less likely to sag over time, and capable of withstanding high water pressure. These traits make it an ideal choice for main water lines or high-demand systems where pressure surges may occur. With copper, long-term structural integrity is rarely a concern.
Impressive Longevity and Low Maintenance
When installed correctly, copper plumbing systems can last over 50 years, sometimes even surpassing a full century. This remarkable lifespan is often unmatched by synthetic materials, which may degrade more quickly or be prone to failure in certain conditions. Copper resists corrosion and doesn’t absorb water, which prevents internal scaling or clogging.
Maintenance requirements are also minimal. Homeowners with copper plumbing often enjoy fewer repair calls, as the material rarely fails without significant external damage. Its long-term performance is one of the reasons why it continues to be a preferred material in both residential and commercial plumbing, even in modern times when alternatives are readily available.
Safe Water Quality Without Chemical Leaching
One of copper’s most valued benefits is its safety in terms of water quality. Unlike some plastics that may leach chemicals into drinking water, copper remains inert and does not contaminate water supplies under normal conditions. This makes it an excellent choice for potable water lines where water safety is non-negotiable.
Additionally, copper has natural antimicrobial properties. Studies have shown that copper surfaces can inhibit the growth of bacteria, viruses, and fungi. While this does not make copper a substitute for water treatment, it adds an extra layer of protection to household plumbing systems, especially in areas with vulnerable water infrastructure.
Environmentally Friendly and Fully Recyclable
In an age where sustainability matters more than ever, copper stands out as one of the most eco-friendly plumbing options. It is 100% recyclable and retains its properties indefinitely, meaning that even old copper pipes can be repurposed without losing performance. The recycling process for copper also requires less energy than producing new plastic or metal pipes, making it a greener alternative in the long term.
The mining and refining processes associated with copper do have environmental impacts, but the fact that copper can be recycled endlessly helps offset some of those effects. For environmentally conscious builders and homeowners, copper offers a responsible choice without compromising durability or safety.
Resistant to Fire and Chemical Damage
Safety is a major consideration in plumbing, especially in areas prone to fires or chemical exposure. Copper’s non-combustible nature gives it an edge over plastic alternatives, which can melt or emit toxic fumes when exposed to high temperatures. This makes copper a safer option for installations near heating systems, furnaces, or in areas where fire risk is a concern.
Moreover, copper resists chemical damage from cleaning agents, waste products, or industrial fluids that may pass through the system. This resilience extends the lifespan of the plumbing and reduces the likelihood of pipe failure due to external contamination or chemical reactions.
Fewer Issues with Insurance and Building Codes
Because of its long-standing track record and safety features, copper plumbing is typically favored in insurance risk assessments and building code compliance. Many local plumbing codes still recognize copper as the standard for residential installations, especially for supply lines. Some insurance providers may even offer lower premiums for homes outfitted with copper pipes, recognizing the material’s reduced risk of failure and fire resistance.
Contractors also appreciate that copper piping is easy to inspect, identify, and work with during renovations or repairs. Its universal acceptance across jurisdictions simplifies permitting and inspection processes, saving time and effort during construction.
Great Performance in High-Pressure Systems
In high-pressure systems, the strength of copper piping becomes a clear asset. It holds up well under constant pressure, minimizing the risk of leaks or ruptures. The joints in copper systems, typically soldered rather than glued, offer additional stability. This tight, reliable sealing makes copper suitable for both hot and cold water distribution throughout a home or building.
When the plumbing system must serve multiple outlets or function over long distances, copper’s ability to maintain pressure levels efficiently ensures consistent performance. This is especially important in multi-story buildings, apartment complexes, or commercial structures where water delivery needs to be both reliable and evenly distributed.
Proven Track Record and Long-Term Value
Copper has been used for plumbing for well over a century, and its track record speaks for itself. Unlike newer materials that have yet to prove themselves over multiple generations, copper has stood the test of time. It’s common to find century-old copper pipes still in service today, providing excellent water quality and performance despite decades of use.
This proven reliability offers peace of mind to property owners. While initial installation costs may be higher, the long-term value is significant. Fewer repairs, longer life expectancy, and superior performance make copper a cost-effective option in the broader context of homeownership or building management.
Unmatched Versatility in Applications
Copper can be used in a wide range of applications, from drinking water lines and hydronic heating systems to gas distribution and even outdoor irrigation. Its versatility is one of the reasons it remains a go-to solution for both residential and commercial construction. Whether you’re installing a simple bathroom fixture or planning an extensive plumbing overhaul, copper can often meet the specifications with ease.
Its compatibility with other materials and fittings also makes it easier to retrofit older systems or blend with modern innovations. Copper-to-PEX adapters, for example, allow plumbers to mix materials in a way that balances cost and performance while preserving the advantages of both systems.
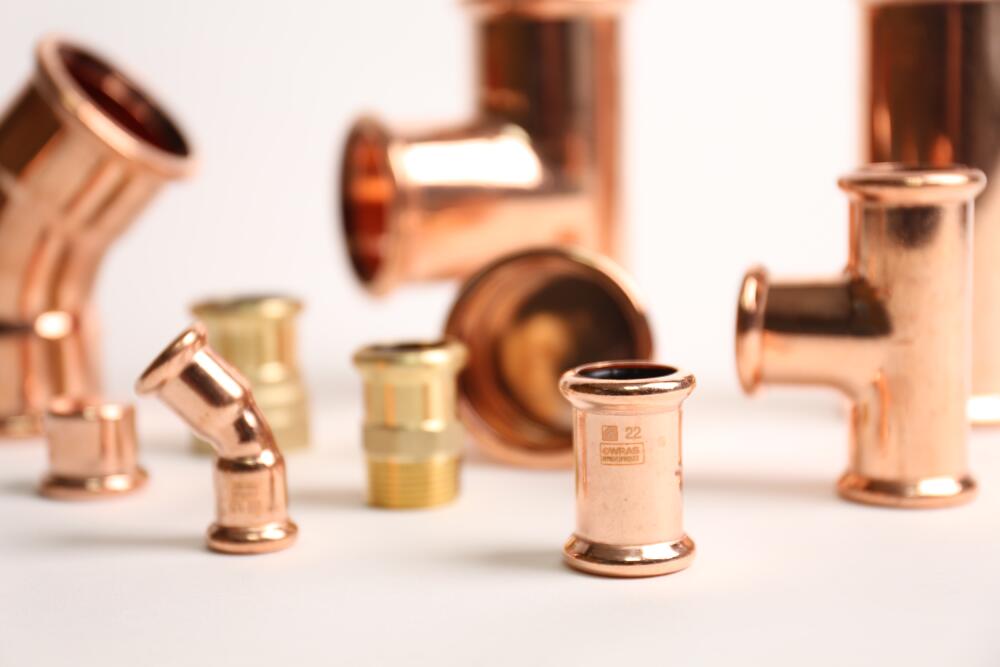
Easy to Work With and Modify
Though it requires skilled labor, copper is still considered one of the easier metals to work with in plumbing. It can be cut, shaped, and soldered with precision, allowing for clean, custom installations that fit complex architectural layouts. For professionals, this means fewer limitations and more control over the system design.
Modifications or additions to a copper system are also relatively simple compared to certain plastic or composite systems that may require proprietary tools or parts. The widespread availability of copper fittings and tools makes it convenient to source materials and complete jobs without delays.
Trusted by Professionals Across the Industry
Many seasoned plumbers still swear by copper as their preferred material. Its predictability, strength, and ease of use make it a staple in their toolkits. Whether performing repairs, installations, or diagnostics, professionals often trust copper because of its long-established behavior under stress and time.
Moreover, because copper has been around for so long, there is a deep body of knowledge and training available. Most licensed plumbers have experience with copper, reducing the risk of errors during installation or service. This collective experience contributes to the ongoing popularity of copper despite the introduction of newer materials.
Reviving Vintage Charm: Smart Plumbing Practices for Older Homes
Plumbing in older homes can feel like navigating a labyrinth of unknowns. Whether you’re restoring a classic Victorian, maintaining a 1950s ranch, or breathing new life into a mid-century craftsman, older properties carry the marks of their age—especially beneath the surface. Aging pipes, outdated materials, and antiquated layouts can pose serious challenges. To preserve the character of your home while ensuring modern-day reliability, certain plumbing best practices are essential.
Understanding the Plumbing Blueprint of the Past
 Older homes often have complex or inconsistent plumbing layouts. These systems were typically built according to the standards of their time, which may not align with current safety codes. It’s not uncommon to encounter galvanized steel, lead, or cast-iron piping. Each of these materials has its own lifespan and maintenance concerns. Before making any decisions, a comprehensive inspection is necessary to understand what’s hidden behind the walls and under the floors.
A plumbing map of the existing system can be created to identify the location of shut-off valves, the direction of water flow, and areas that may have been modified or patched over the decades. This blueprint serves as the foundation for any upgrades or repairs and helps prevent surprises during future renovations.
Evaluating the Pipe Materials and Their Condition
The material composition of plumbing in older homes is crucial to its long-term performance. Galvanized pipes, commonly used in homes built before the 1960s, corrode over time and restrict water flow. Lead pipes, though rare today, pose serious health risks and should be replaced immediately. Cast iron, while durable, can corrode from the inside out, leading to structural damage and leakage.
Copper and PEX piping are now favored for replacements due to their durability and ease of installation. However, choosing to replace plumbing components must take into account the overall integrity of the home’s structure, especially if plaster walls or historic tilework are involved.
Dealing with Low Water Pressure
Low water pressure is a typical symptom of aged plumbing. It may stem from mineral buildup inside pipes, leaks, or poorly designed systems that don’t accommodate modern fixtures. Simply replacing fixtures rarely solves the issue if the root cause lies in the infrastructure.
Addressing low pressure may require replacing sections of pipe or installing a pressure-boosting system. In some cases, converting the main water line to a wider diameter pipe can bring substantial improvements. These fixes should be tailored to the specific plumbing constraints of the house and performed with minimal disruption to the home’s vintage features.
Upgrading Drainage Without Damaging History
Drainage problems in older homes often result from inadequate venting or outdated slope designs. Slow drains, frequent clogs, and sewer backups are all indicators that the drainage system needs attention. However, older homes frequently feature narrow access points and delicate finishes that make repair work more challenging.
Working with a plumber experienced in historic properties ensures that upgrades are sympathetic to the structure. Solutions such as trenchless sewer repair or strategically placed access panels can minimize cosmetic damage while solving functional issues. Venting can sometimes be retrofitted using air admittance valves, which offer flexibility when full re-piping isn’t feasible.
Modernizing Fixtures While Retaining Character
A key balance in renovating an older home is upgrading functionality without compromising charm. Antique bathtubs, pedestal sinks, and vintage faucets often add to the aesthetic appeal but may not be practical for daily use. Replacing internal components like valves or supply lines can breathe new life into old fixtures while improving performance.
In cases where full replacement is necessary, many modern manufacturers offer retro-style fixtures that match the look of historical designs. These provide energy efficiency and contemporary reliability without looking out of place in a heritage setting. Adapting these elements allows you to honor the past while embracing modern convenience.
Dealing with Water Heater and Supply Line Issues
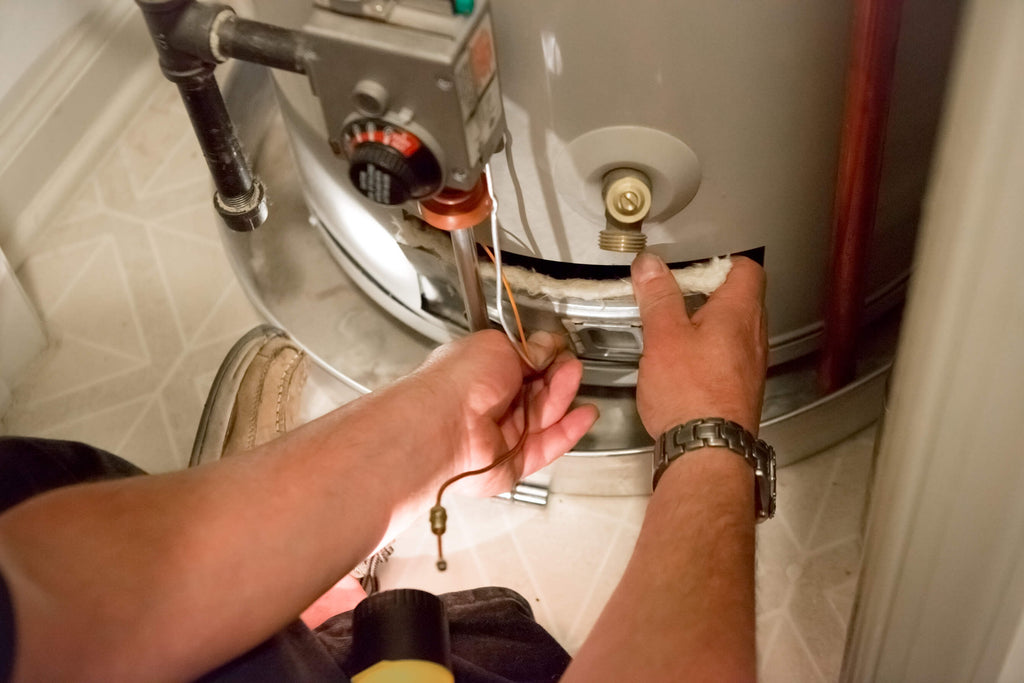 Hot water demands have changed dramatically since many older homes were constructed. Small, tank-based water heaters often cannot keep up with the needs of a modern family, especially if the home has been expanded or the plumbing system has grown more complex.
Installing a tankless water heater or upgrading to a larger capacity model can alleviate the problem. Additionally, replacing outdated supply lines with insulated pipes helps maintain temperature stability and prevents heat loss, a common issue in poorly insulated older homes.
Keeping Leaks and Moisture Under Control
Old pipes and joints are prone to hidden leaks that may go unnoticed for years. Even minor leaks can lead to significant issues, including rot, mold, and compromised structural integrity. Periodic inspections, particularly around basements, crawl spaces, and behind appliances, help catch leaks early.
Moisture sensors and smart leak detection systems can now be installed to monitor water usage and alert homeowners to irregularities. These devices are especially useful in historic homes where early detection can prevent damage to irreplaceable architectural elements.
Maintaining Proper Ventilation in Plumbing Systems
Many older homes were built without modern plumbing ventilation codes. This can result in poor drainage, gurgling sounds, or foul odors. Proper venting helps regulate air pressure in the pipes and allows wastewater to flow freely.
Retrofitting vent systems in a minimally invasive way is a challenge, but it can be done. Stack vents can sometimes be added in closets or along less visible areas, and air admittance valves offer flexible solutions where traditional vent stacks are not possible. Careful planning is required to avoid compromising the aesthetics of the home.
Addressing Sewer Line Vulnerabilities
Sewer lines in older homes are often clay or cast iron and are vulnerable to root intrusion, shifting soil, and corrosion. Even if no current issues are present, a sewer camera inspection can provide peace of mind. Early detection of cracks or blockages prevents expensive repairs and sanitation issues.
If replacement becomes necessary, trenchless technology allows for updating the main sewer line without digging up the yard or damaging the foundation. This approach is especially helpful in historic districts where preserving landscaping and hardscaping is a priority.
Integrating Plumbing with Electrical and HVAC Upgrades
When upgrading an older home, plumbing rarely exists in isolation. Electrical wiring and HVAC systems often intersect, especially in kitchens and bathrooms. Coordinating these upgrades ensures that changes in one system don’t negatively affect another.
For instance, installing a modern shower might require new GFCI outlets or an upgraded breaker panel. Similarly, routing new plumbing lines through tight spaces might mean rerouting ductwork or electrical conduit. A holistic approach minimizes rework and keeps renovations on track.
Preserving Aesthetic Integrity During Repairs
Older homes often feature intricate moldings, plasterwork, and wood finishes that are difficult to replicate once damaged. When plumbing repairs are needed, using access panels or working from crawl spaces can protect finishes. It’s also helpful to document all architectural elements before starting repairs so they can be carefully restored afterward.
Hiring professionals with experience in heritage restoration ensures repairs are completed with sensitivity to the original design. In some cases, custom millwork or reproduction tiles may be necessary to maintain visual continuity.
When Full Re-piping Becomes Necessary
There comes a point when the existing plumbing system is simply too far gone to salvage. Frequent leaks, poor water quality, and non-compliance with building codes may necessitate a full re-pipe. While this is a significant investment, it also offers an opportunity to future-proof the home.
A full re-pipe should be done with careful planning to preserve the structure’s appearance. Wall cavities, baseboards, and floorboards may be used as pathways for new pipes. If the home has plaster walls, using minimally invasive methods to channel the pipes reduces mess and repair costs.
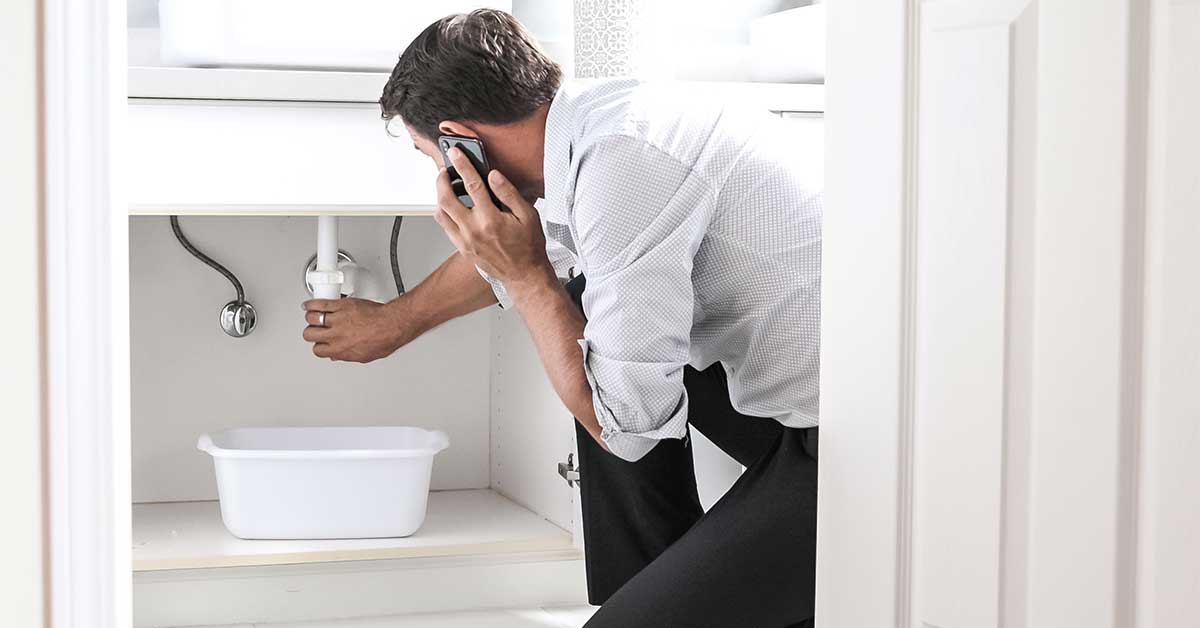
Planning for the Future While Honoring the Past
Owning an older home is a commitment to both preservation and adaptation. While the charm and craftsmanship of a bygone era are irreplaceable, modern plumbing standards cannot be ignored. A thoughtful renovation approach focuses on long-term performance while protecting the soul of the property.
It’s wise to keep detailed records of all upgrades, including photos, blueprints, and permits. This documentation can aid future homeowners or contractors and may also help when applying for historical tax credits or permits.
How to Install a Garbage Disposal: A Plumbing Tutorial
Installing a garbage disposal may seem like a task best left to professionals, but with the right guidance and a bit of patience, it can be tackled by most homeowners. A garbage disposal adds convenience to your kitchen by efficiently grinding food waste, helping reduce household garbage and minimizing clogs in your plumbing. This guide walks you through the entire process of installation, from preparation to final testing, offering a comprehensive understanding of how everything fits together.
Understanding the Role of a Garbage Disposal
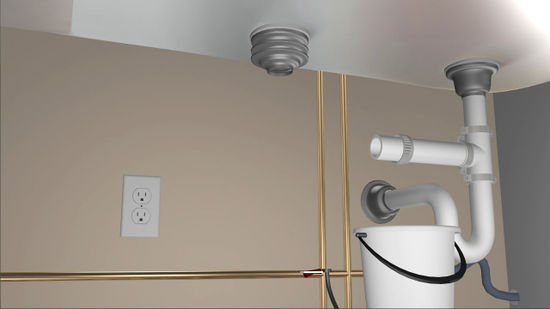 Before diving into the installation process, it helps to understand what a garbage disposal actually does. This appliance is mounted beneath the kitchen sink and is connected to the drain. It uses a motor-driven plate to spin impellers, which grind food waste into small particles. These particles are then flushed through the plumbing system with running water. Most disposals also include safety features such as overload protectors and manual reset buttons.
Installing a disposal not only reduces the amount of food waste going to landfills but also keeps your kitchen cleaner and more hygienic. However, installation involves both plumbing and electrical work, which requires proper handling to ensure safety and functionality.
Gathering the Necessary Tools and Components
Before beginning the installation, it’s important to collect all the tools and materials required for the job. Commonly used tools include a screwdriver, plumber’s putty, pipe wrench, hammer, pliers, and an electrical cord kit if the disposal doesn’t come prewired. You’ll also need a garbage disposal unit compatible with your sink setup and plumbing.
If you’re replacing an old unit, you should ensure that the new disposal fits into the existing mounting bracket or determine whether a new mounting assembly is needed. Additionally, having a bucket and some rags handy will make cleaning up easier in case of water spills during disassembly.
Removing the Existing Drain Assembly
If you are replacing an old garbage disposal or installing one for the first time, you will need to disconnect the existing drain assembly. Start by turning off the power at the circuit breaker to avoid any electrical hazards. Place a bucket under the sink to catch any water that may spill when the pipes are disconnected.
Remove the P-trap and discharge pipe from the sink drain. If a garbage disposal is already installed, you’ll need to unmount it by turning it counterclockwise from the mounting ring. Use a screwdriver to loosen the mounting assembly from the sink. Carefully remove any old plumber’s putty or debris from around the drain opening to prepare for the new installation.
Installing the Mounting Assembly and Sink Flange
The sink flange is the part that connects the disposal unit to the sink drain. It needs to be sealed properly to prevent leaks. Begin by applying a generous amount of plumber’s putty around the underside of the new flange. Press the flange firmly into the sink drain opening, ensuring a snug fit.
Underneath the sink, slide the backup ring, fiber gasket, and mounting ring over the flange and secure them with the snap ring. Tighten the mounting screws evenly until the assembly feels firmly attached to the sink. Wipe away any excess putty that squeezes out around the flange.
The strength of this connection is critical since it holds the disposal in place and maintains a watertight seal. Ensuring a solid, even fit at this stage will prevent future leaks and mechanical issues.
Wiring the Electrical Components
Some disposals come with an electrical cord preinstalled, while others require you to wire it yourself. If you’re working with a corded model, simply plug it into a grounded outlet. For disposals that need to be hardwired, you’ll need to remove the wiring compartment cover on the bottom of the unit.
Carefully connect the black wire to the black wire, the white wire to the white wire, and the ground wire to the green grounding screw. Secure the wires using wire connectors and ensure all connections are tight and insulated. Replace the cover before proceeding.
Electricity and water are a dangerous combination, so double-check that the power remains off during the wiring process. Once connected, the electrical system should be tested only after the full installation is complete.
Connecting the Dishwasher Hose and Drain Line
 Most garbage disposals have a small knockout plug that needs to be removed if you plan to connect a dishwasher. This plug covers the opening where the dishwasher drain hose will be attached. Use a screwdriver and hammer to gently knock out the plug, then remove it from inside the unit.
Attach the dishwasher hose to the inlet and secure it with a hose clamp. Next, connect the disposal’s discharge outlet to the drain trap using the discharge tube and gasket provided with the unit. Ensure the discharge tube aligns with the existing drain plumbing to avoid having to make extensive modifications.
Tighten all slip nuts by hand, then use pliers for an additional quarter turn if necessary. A well-aligned and properly tightened drainage system will ensure the disposal functions efficiently and without leaks.
Mounting the Garbage Disposal Unit
With the plumbing and electrical components in place, it’s time to mount the disposal to the sink. Lift the disposal and align it with the mounting ring attached to the sink flange. Turn the disposal clockwise to lock it into place. Most units will have a quick-lock feature that securely fastens the disposal with a simple twist.
If the unit feels loose, double-check the mounting ring and screws to ensure everything is tightened appropriately. The weight of the disposal must be fully supported by the mounting ring to prevent sagging or dislodgement over time.
Once mounted, gently tug on the unit to confirm it is secure. Avoid using force, as over-tightening can damage the flange or cause misalignment with the drainpipes.
Testing the System for Leaks and Operation
Now that the installation is complete, it’s time to test everything. First, restore power to the disposal by turning the circuit breaker back on or plugging in the unit. Before running the disposal, fill the sink with water and check for any leaks at all joints and seals.
Turn on the water and activate the disposal. Listen for any unusual noises, which could indicate a loose component or foreign object inside the unit. The sound should be a smooth hum, not a grinding or rattling noise. If everything sounds normal, run some food scraps through the disposal to test its grinding capability and ensure waste is properly flushed through the plumbing.
Check under the sink once more for any signs of leaks. Even small drips can indicate a seal problem that needs immediate attention. If everything remains dry, your installation has been a success.
Maintenance Tips for Long-Term Efficiency
To keep your garbage disposal running efficiently, regular maintenance is essential. Avoid putting fibrous vegetables, bones, or grease down the disposal, as these can cause clogs or damage the grinding components. Running cold water while operating the disposal helps solidify any fats or oils, making them easier to grind and flush away.
Periodically cleaning the unit with a mixture of baking soda and vinegar can help remove odors and buildup. Ice cubes can also be ground occasionally to clean the blades and sharpen them. Avoid chemical drain cleaners, as they can corrode the internal parts of the disposal.
Routine inspection of seals, hoses, and electrical connections will ensure your disposal continues to function safely and effectively over the years. Addressing small issues early can help you avoid costly repairs and extend the lifespan of your unit.
When to Call a Professional
While many homeowners can handle a garbage disposal installation with the right tools and instructions, certain situations may require professional help. If your home has old or fragile plumbing, nonstandard sink configurations, or complex electrical needs, hiring a licensed plumber or electrician might be the safer choice.
Also, if you’re installing a disposal for the first time and your kitchen doesn’t have a grounded outlet or appropriate circuit, electrical work will be necessary to ensure compliance with local codes. Attempting such modifications without proper knowledge could lead to safety hazards or even damage your home’s infrastructure.
Recognizing your own limits and knowing when to seek expert assistance can make all the difference between a successful installation and a costly mistake.